20.3 Removing an XBU
20.3 Removing an XBU
This section describes the procedure for removing an XBU.
- Place the server in the cold state.
For details on handling power cords, see "9.8.2 Removing the Power Cords."
|
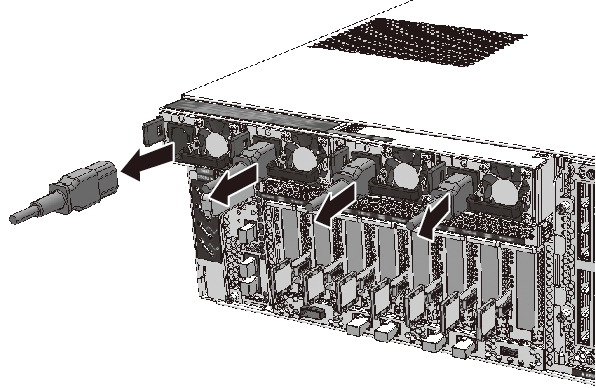
Figure 20-2 Removing a Power Cord
|
|
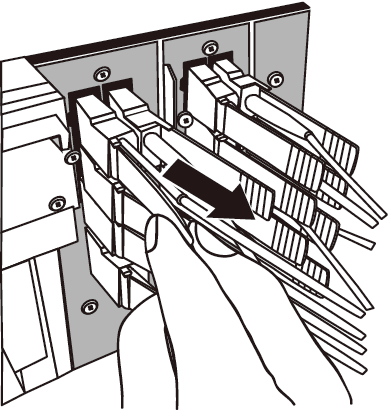
- Remove the crossbar cables.
Remove all the crossbar cables from the XBU to be replaced. For the procedure for removing the crossbar cables, see "19.3 Removing the Crossbar Cable."
|
Figure 20-3 Removing the Crossbar Cable
|
|
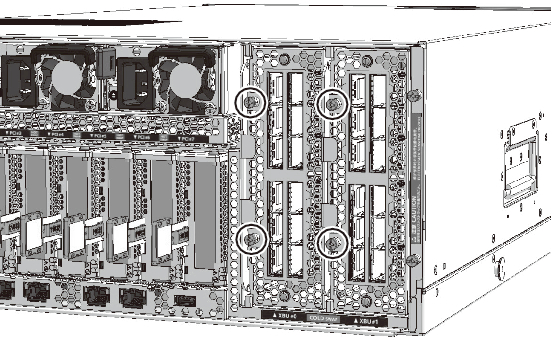
- Loosen the fixing screws of the XBU.
Loosen the two fixing screws of the XBU to release the removal levers.
|
Figure 20-4 Fixing Screws of the XBU
|
|
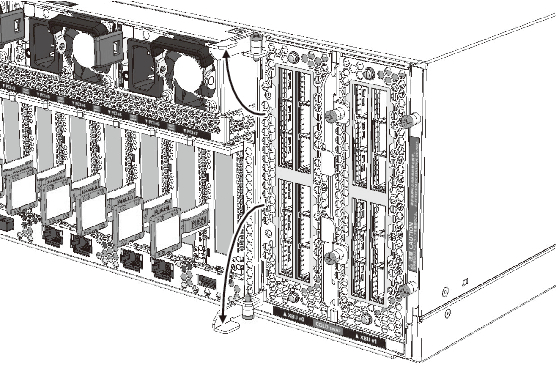
- Open the removal levers of the XBU.
Open the removal levers of the XBU, and disconnect the connector from the CPU memory unit.
|
Figure 20-5 Opening the Removal Levers of the XBU
|
|
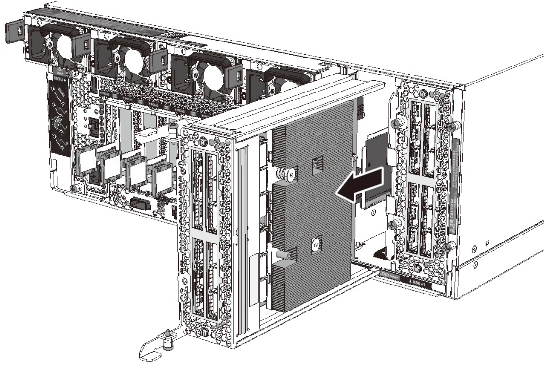
- Remove the XBU.
Hold the top and bottom of the XBU with both hands, and remove the unit from the server carefully to avoid mechanical shock.
|
Figure 20-6 Removing the XBU
|
|
| Note - If the cable support is used, remove the XBU with the cable support lowered. |
| Note - Place the removed XBU on the ESD mat to ground any static electricity. |
< Previous Page | Next Page >