12.4.1 Installing a PCIe Card or PCIe Card Filler
12.4.1 Installing a PCIe Card or PCIe Card Filler
This section describes the procedure for installing a PCIe card or PCIe card filler in the PCICS.
| Note - Perform this work with the PCIe card cover and the fixing bracket of the PCIe card removed from the PCICS. |
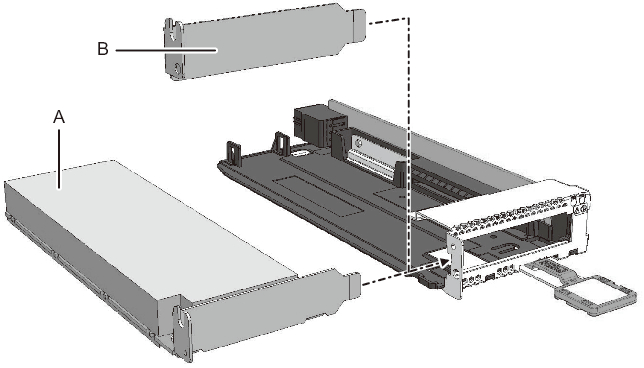
- Install the PCIe card (A in Figure 12-9) or the PCIe card filler (B in Figure 12-9).
|
Figure 12-9 Installing a PCIe Card or PCIe Card Filler
|
|
| Note - Install a PCIe card filler in the PCICS when you have removed a PCIe card. |
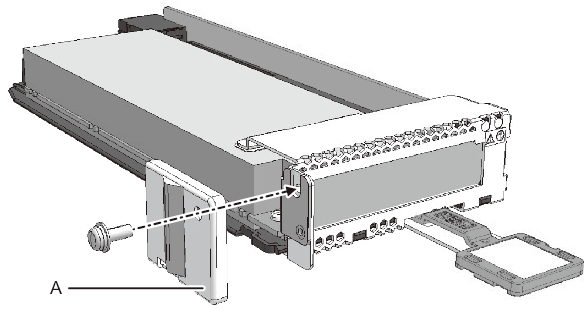
- Secure the PCIe card or PCIe card filler.
Install the fixing bracket (A in Figure 12-10) to the PCICS, and secure it with the screw.
|
Figure 12-10 Securing the PCIe Card or PCIe Card Filler
|
|
- Install the PCIe card cover.
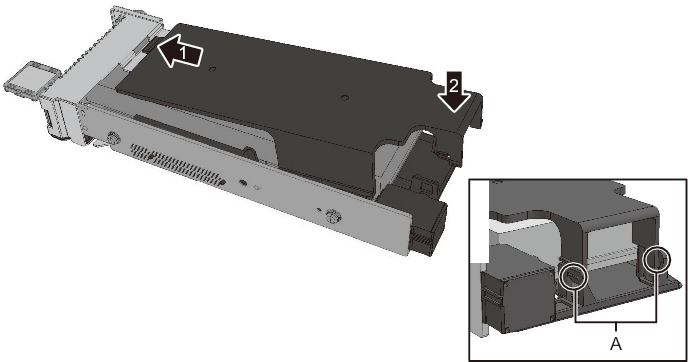
Insert the PCIe card cover into the fixing guide of the PCICS (1 in Figure 12-11), and then push the rear part of the cover (2 in Figure 12-11) to secure it.
|
Figure 12-11 Installing the PCIe Card Cover
|
|
| Note - Confirm that the lock of the PCIe card cover (A in Figure 12-11) firmly fits into the PCICS. |
| Note - Be sure to install the PCIe card cover. This cover serves as a guide when you insert the PCICS into the server. |
- Install the PCIe card.
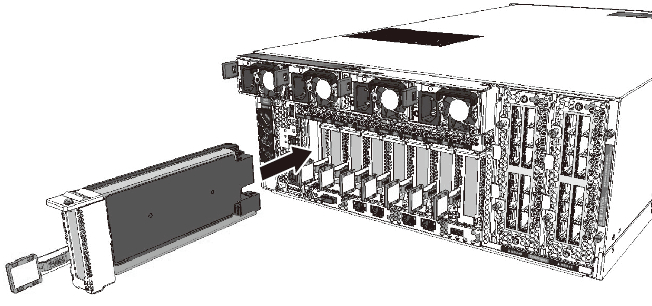
Insert the PCICS into the server or PCI expansion unit, with the removal lever of the PCICS pushed up.
|
Figure 12-12 Installing the PCIe Card
|
|
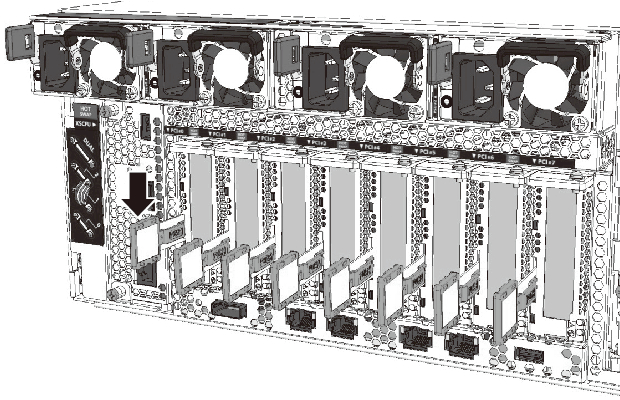
- Secure the PCICS.
Lower the removal lever while pushing the latch of the PCICS to secure the PCICS to the server or PCI expansion unit.
|
Figure 12-13 Securing the PCICS
|
|
| Note - Securing the PCICS to the server or PCI expansion unit prevents the PCICS from being shaken off by an unexpected vibration or shock. |
- Connect the cables.
Connect the cable to the replacement or added PCIe card, and bundle the cables using the hook-and-loop fastener.
| Note - When you have removed a PCIe card, this step is not necessary. |
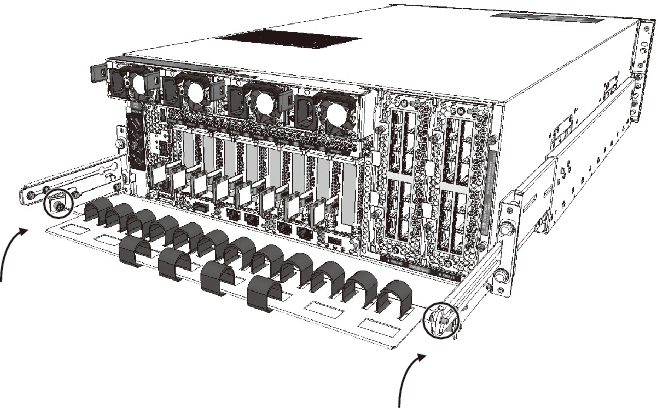
- Return the cable support to the original position.
Return the cable support to the original position, and then secure it with two screws.
|
Figure 12-14 Securing the Cable Support
|
|
< Previous Page | Next Page >