11.6 Installing the XSCFU
11.6 Installing the XSCFU
This section describes the procedure for installing the XSCFU in the SPARC M12-2/M12-2S.
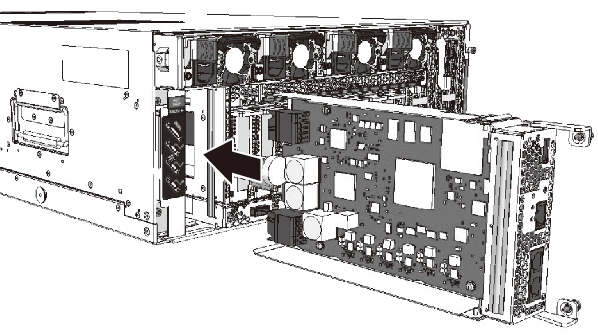
- Insert the XSCFU.
Insert the XSCFU into the server with the XSCFU levers open.
|
Figure 11-11 Inserting the XSCFU Into the Server
|
|
|

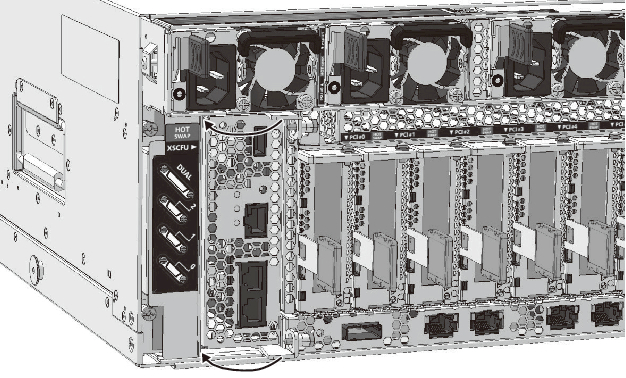
- Connect the XSCFU to the BPU.
Close the XSCFU levers to connect the XSCFU to the BPU.
|
Figure 11-12 Connector Connection of the XSCFU and BPU
|
|
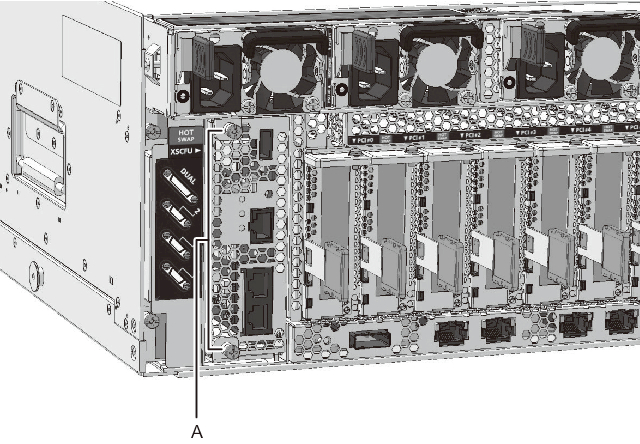
- Secure the XSCFU.
Tighten the fixing screws in the levers (A in Figure 11-13) to secure the XSCFU.
|
Figure 11-13 Securing the XSCFU to the BPU
|
|
| Note - Be sure to secure the levers of the XSCFU by tightening the screws. Securing the levers by tightening the screws prevents poor connection between the XSCFU and BPU. |
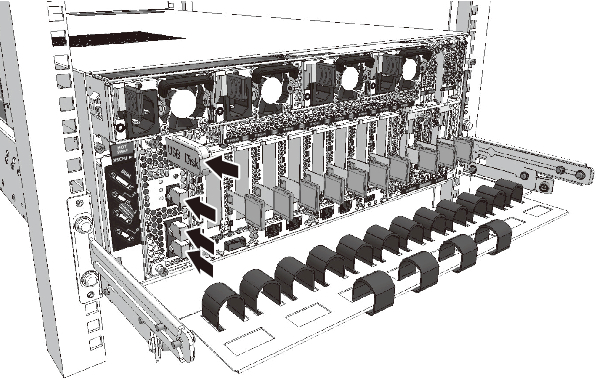
- Connect the LAN cables and other components to the XSCFU.
Connect the LAN cables to the XSCFU to return it to the state it was in before the maintenance work. Then, return the cable support to its original position.
This completes the installation of the XSCFU.
|
Figure 11-14 Returning to the Pre-Maintenance State
|
|
< Previous Page | Next Page >