16.4.1 Installing the OPNL
16.4.1 Installing the OPNL
| Note - If you are replacing the OPNL of the SPARC M12-2S, first set the BB-ID value from the note made in "16.3.3 Removing the OPNL," and then install the OPNL. |
| Note - In the case of the SPARC M12-2, you cannot set a BB-ID value for the OPNL. |
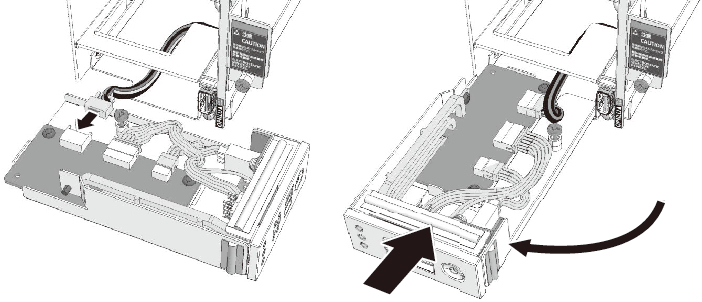
- Connect the OPNL and HDDBPU.
After connecting the OPNL and HDDBPU via the connector, insert the OPNL into the HDDBPU.
|
Figure 16-10 Installing the OPNL
|
|
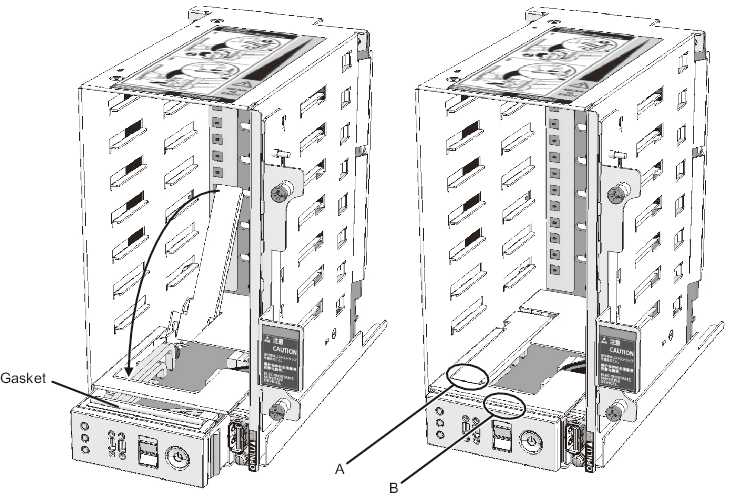
- Check that the OPNL is installed properly.
- a. Make sure that the tip of the removal lever (A in Figure 16-11) is securely fitted.
- b. Make sure that the gasket is pushed in all the way so that no part of it is seen (B in Figure 16-11).
|
Figure 16-11 Securing the OPNL
|
|
| Note - If the tip of the removal lever is not securely fitted or part of the gasket is seen, pull out the OPNL. Check whether the cables are stored properly, and then repeat step 1. |
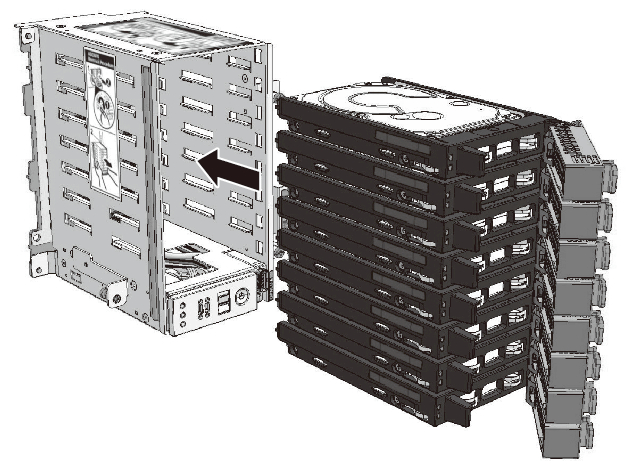
- Install the HDD/SSD and filler units.
Install the removed HDD/SSD and filler units. For details, see "15.4 Installing an HDD/SSD or Filler Unit."
|
Figure 16-12 Installing the HDD/SSD and Filler Units
|
|
< Previous Page | Next Page >