19.3 Removing the Crossbar Cable
19.3 Removing the Crossbar Cable
This section describes the procedure for removing the crossbar cable.
| Note - The crossbar cables can be removed only in two cases. The first is when the physical partition dynamic reconfiguration (PPAR DR) function releases the SPARC M12-2S from a building block configuration, placing the server in the cold state. The second is when the SPARC M12-2S in a building block configuration is placed in the cold state. |
- Confirm the crossbar cable to be replaced.
Log in to the XSCF and execute the showstatus command or showlogs error command. Then, confirm the ports connected to the crossbar cables to be replaced. For details on the commands, see "8.2.2 Identifying a Fault."
- The underlined part in the error example below indicates that an error has been found in the crossbar cable connected to port number 0R of XBU#0 mounted in BB#1.
| Date: Sep 08 14:10:25 JST 2016 Code: 80002100-007d20007811007811-150650000130049a00313000 Status: Alarm Occurred: Sep 08 14:10:12.925 JST 2016 FRU: /BB#1/XBU#0/CBL#0R,/BB#1/XBU#0,/BB#0/XBU#0 Msg: XB-XB interface link-up error |
From the above error message and "Appendix A Lists of Cable Connections in a Building Block Configuration," identify the port number at the other end of the connection of the target crossbar cable.
In this example, "BB00-XBU0-0R" is the port number at the other end.
In this example, "BB00-XBU0-0R" is the port number at the other end.
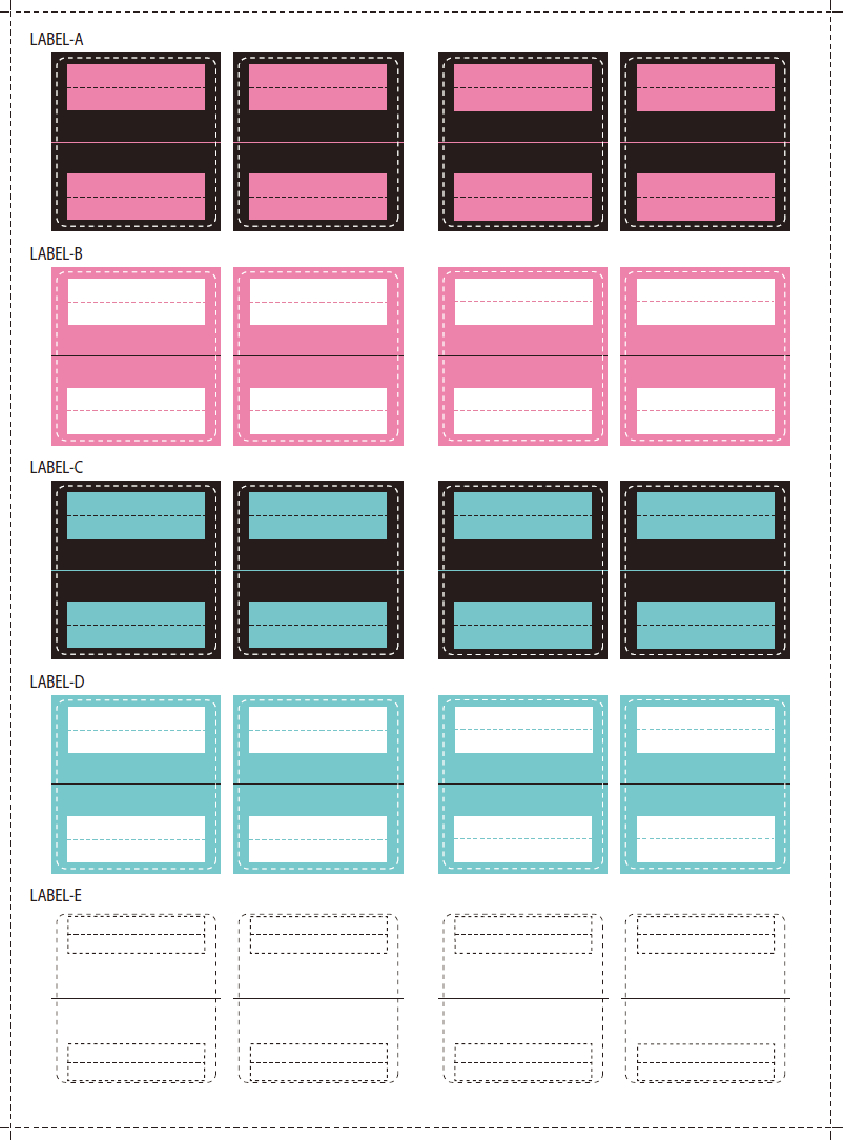
- Affix labels to the crossbar cable.
The replacement crossbar cable comes with the labels shown in Figure 19-3. Write the connected port on these labels. For the crossbar cable, use LABEL-A to LABEL-D.
|
Figure 19-3 Labels on Which to Write the Connected Port
|
|
- Place the server in the cold state.
To perform maintenance after every SPARC M12-2S was placed in the cold state without using the maintenance menu, remove the power cords of every SPARC M12-2S. For details on handling power cords, see "9.8.2 Removing the Power Cords."
|
Figure 19-4 Removing a Power Cord
|
|
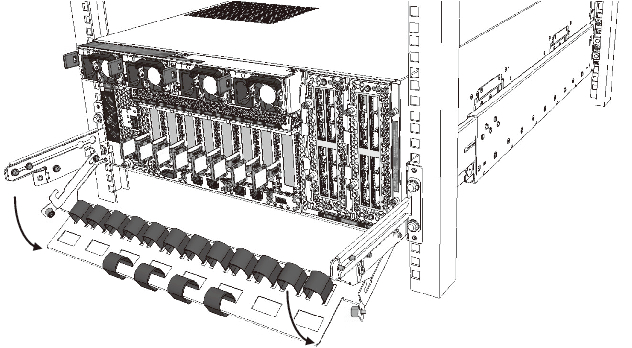
- Unbundle the crossbar cable.
Release the crossbar cable to be replaced, by removing the hook-and-loop fastener that bundles the crossbar cable. - Lower the cable support.
Loosen the fixing screws, pull out the cable support, and lower the cable support.
|
Figure 19-5 Lowering the Cable Support
|
|
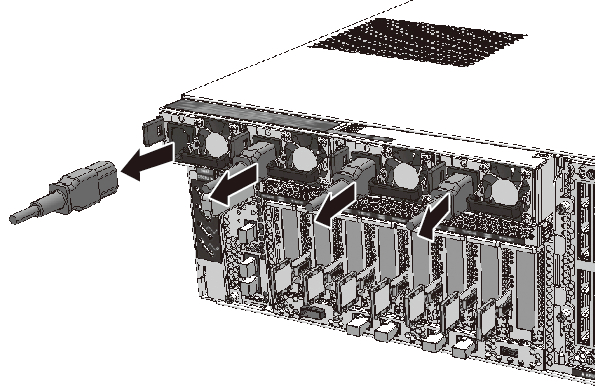
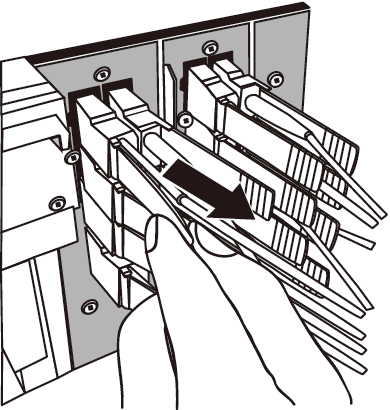
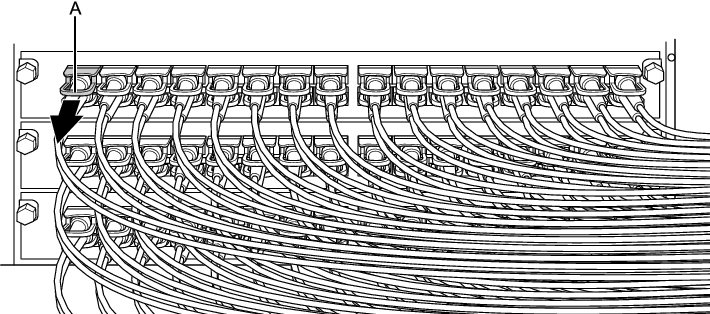
- Remove the crossbar cable.
Pull the pull-tab (Figure 19-6 and A in Figure 19-7) of the crossbar cable to release the lock of the connector and the XBU, and remove the crossbar cable.
The pull-tab differs in shape according to the type of crossbar cable. For details, see Figure 19-9 and Figure 19-10.
| Note - Remove crossbar cables one by one. |
| Note - When you maintain the crossbar box, you may remove the crossbar cables with the power on. |
| Note - The cables at the rear of the crossbar box are bundled together and fastened to the right-hand cable support with a hook-and-loop fastener. To remove the crossbar cables, remove the hook-and-loop fastener from the cable support. |
|
Figure 19-6 Removing the Crossbar Cable (SPARC M12-2S)
|
|
|
Figure 19-7 Removing the Crossbar Cable (Crossbar Box)
|
|
|

< Previous Page | Next Page >