18.4.1 Enabling the Removal of the BPU
18.4.1 Enabling the Removal of the BPU
To enable the removal of the BPU, you need to remove the FRUs other than the BPU. This section describes the procedure for removing the FRUs other than the BPU.
- Place the server in the cold state.
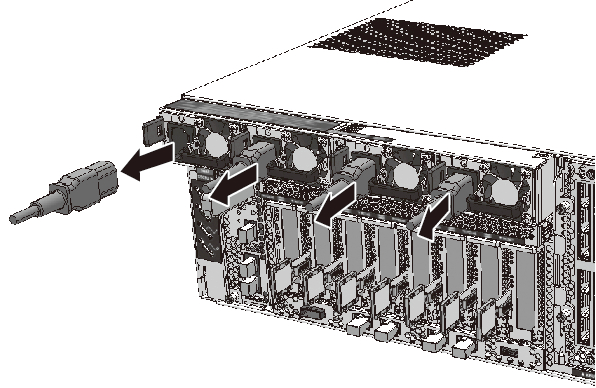
Remove the power cords from the PSUs to place the server in the cold state. For details on handling power cords, see "9.8.2 Removing the Power Cords."
|
Figure 18-2 Removing a Power Cord
|
|
- Remove the PCICSs from the server.
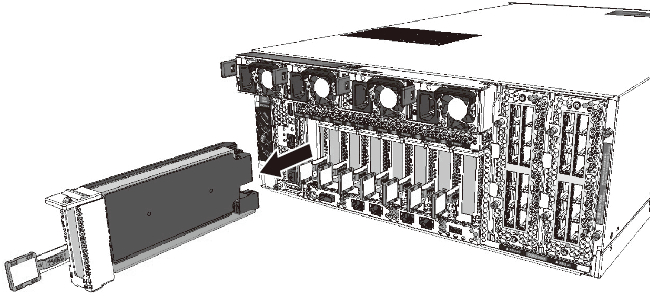
Remove all the PCICSs from the server. For details, see "12.3.1 Enabling the Removal of a PCIe Card." You do not need to remove the PCIe cards from the PCICSs.
|
Figure 18-3 Removing the PCICS
|
|
- Remove the crossbar cables.
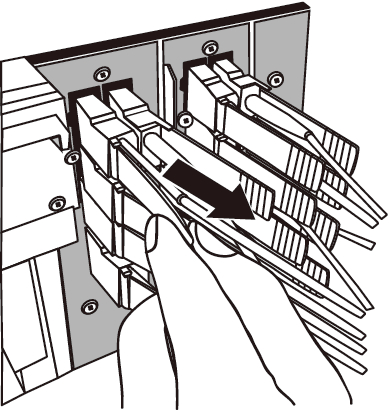
- Remove all the crossbar cables connected to the XBU. For details, see "19.3 Removing the Crossbar Cable." Note that, when you use only one SPARC M12-2 or SPARC M12-2S unit, this step is not necessary.
When using only one SPARC M12-2S unit, proceed to step 4. When using only one SPARC M12-2 unit, proceed to step 5.
|
Figure 18-4 Removing the Crossbar Cable
|
|
- Remove the XBU.
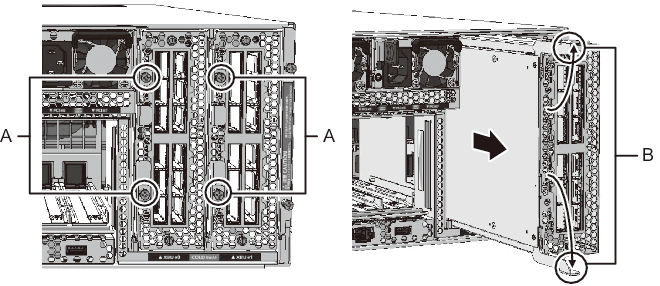
Loosen the two fixing screws (A in Figure 18-5) of the removal levers, and remove the XBU from the server with the removal levers (B in Figure 18-5) open. For details, see "20.3 Removing an XBU."
|
Figure 18-5 Removing the XBU
|
|
- Remove the front cover.
For the procedure for removing the front cover, see "9.8.3 Removing the Front Cover."
| Note - The serial number of the server is printed on a label affixed on the front cover. Store this cover such that it is not mixed up with the front covers of other SPARC M12 units. |
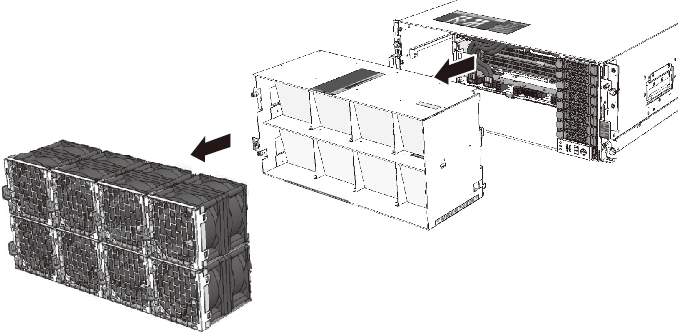
- Remove the FANUs and FANBPU.
Remove all the FANUs from the FANBPU, and then remove the FANBPU from the server. For details, see "14.3 Removing a FANU or the FANBPU."
|
Figure 18-6 Removing the FANUs and FANBPU
|
|
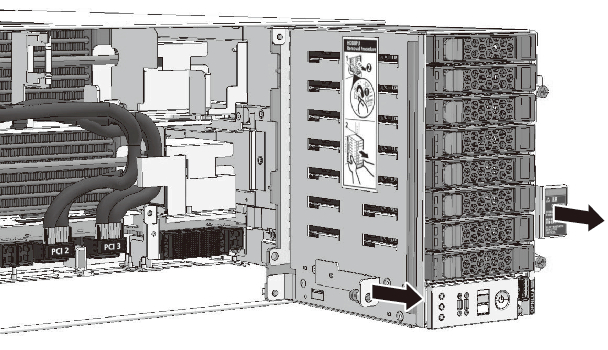
- Remove the HDDBPU.
Remove the HDDBPU from the server. For details, see "16.3 Removing the HDDBPU or OPNL."
|
Figure 18-7 Removing the HDDBPU
|
|
- The CMUL may have a LAN cable, SAS cable, USB cable, or other cable connected to it. Remove them all.
|
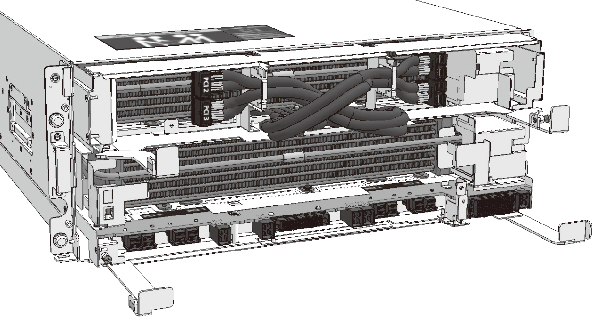
- Disconnect the CMUL and CMUU from the BPU.
Loosen the fixing screws of the CMUL and CMUU, and pull them out to the opening of the server. For details, see "17.4.2 Removing the CMU." When the CMU filler unit is mounted, remove it from the server.
|
Figure 18-8 Pulling Out the CMU
|
|
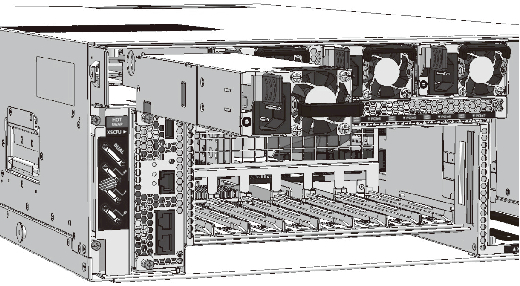
- Remove the PSUs.
Remove all the PSUs from the server. For details, see "13.3 Removing a PSU."
|
Figure 18-9 Removing a PSU
|
|
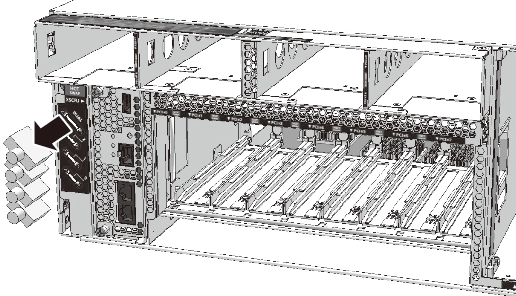
- Remove the XSCF DUAL control cable and XSCF BB control cable.
- Remove the XSCF DUAL control cable and XSCF BB control cable from the server. For details, see "21.3 Removing the XSCF DUAL Control Cable" and "22.3 Removing the XSCF BB Control Cable."
Note that, for a configuration that uses only one SPARC M12-2 or SPARC M12-2S unit, this step is not necessary. Proceed to step 12.
| Note - The XSCF DUAL control cable is connected only to the SPARC M12-2S that houses the master XSCF or standby XSCF. |
|
Figure 18-10 Removing the XSCF DUAL Control Cable/XSCF BB Control Cable
|
|
|
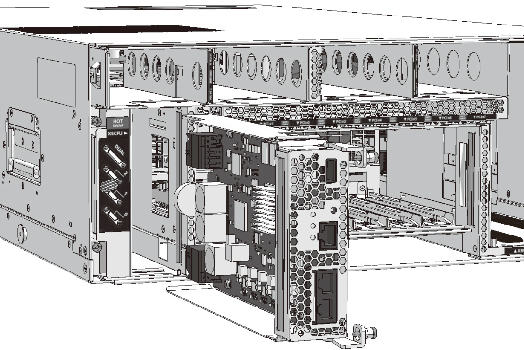
- Remove the XSCFU.
The XSCFU may have a LAN cable, a serial cable, and USB memory connected to it. Remove them all. Then, loosen the fixing screws of the XSCFU, and remove the XSCFU from the server. For details, see "11.4 Removing the XSCFU."
|
Figure 18-11 Removing the XSCFU
|
|
< Previous Page | Next Page >
