17.5.2 Installing the CMU
17.5.2 Installing the CMU
- Insert the CMUL into the server.
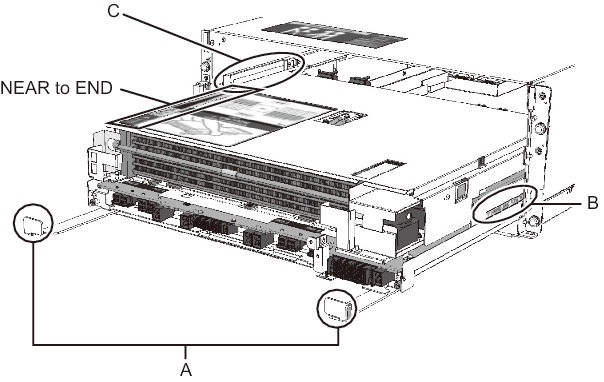
Hold the CMUL at "HANDLING POSITION" (B in Figure 17-23), insert it to the tip of "NEAR to END". Then, hold the CMUL levers (A in Figure 17-23) and insert the CMUL into the server.
Insert the CMUL into the server while taking care not to apply a load on the rear part of the CMUL.
If you have not removed the CMUL, proceed to step 3.
|
Figure 17-23 Inserting the CMUL
|
|
|

- Secure the CMUL.
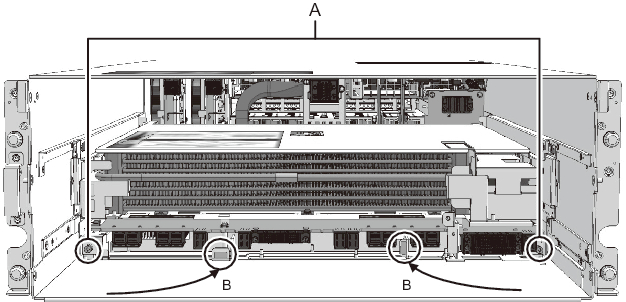
Insert the CMUL slowly, with its levers open, until it sops inside the server. When inserting the CMUL, push the flat part of each CMUL lever (B in Figure 17-24).
When the CMUL stops inside the server, close the CMUL levers and tighten the fixing screws (A in Figure 17-24) to secure the CMUL to the server.
|
Figure 17-24 Connector Connection of the CMUL and BPU
|
|
| Note - When inserting the CMUL into the server, do not push any part other than the flat parts of the CMUL levers. Pushing any other part may damage the CMUL. |
- Insert the CMUU into the server.
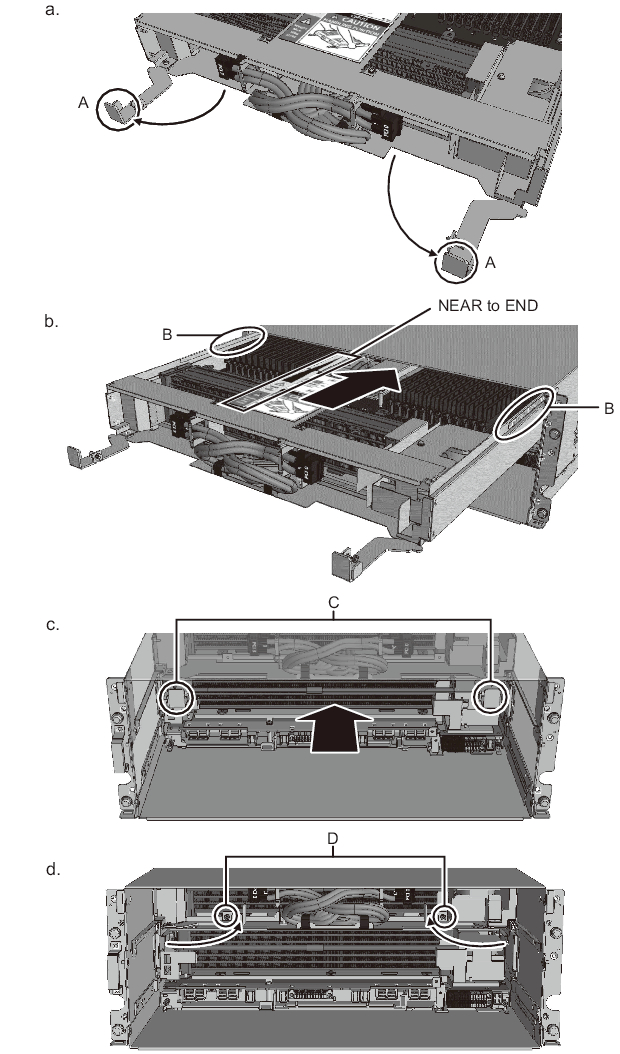
- a. When you insert the CMUU, open the CMUU levers (A in Figure 17-25) while the PCIe cables are bundled with cable clamps.b. Hold "HANDLING POSITION" (B in Figure 17-25) on the sides of the CMUU, and insert it to the server up to the tip of the "NEAR to END" display on the top panel.c. Then, push the flat tips of the CMUU levers (C in Figure 17-25) to insert the CMUU into the server until it stops.d. When the CMUU stops, close the CMUU levers to connect the CMUU to the server. When the CMUU levers are closed completely, tighten the fixing screws (D in Figure 17-25) to secure the CMUU to the server.
|
Figure 17-25 Inserting the CMUU Into the Server
|
|
- Connect the PCIe cables.
Remove the PCIe cables of the CMUU from the cable clamps and connect them to the CMUL.
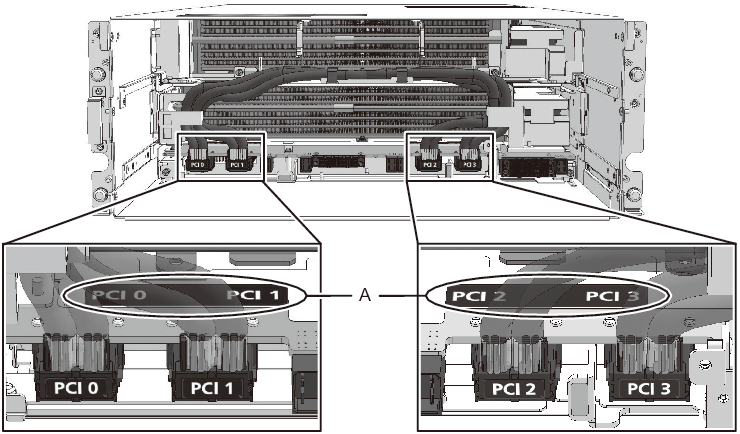
Labels showing the connection destinations are affixed on the PCIe cables and CMUL (A in Figure 17-26). Connect the PCIe cable connectors according to these labels.
After connecting the PCIe cable connectors, route the PCIe cables through the cable guide inside the server.
| Note - The connection destinations of the PCIe cables are shown on the label affixed to the CMUL. (A in Figure 17-26) |
| Note - When connecting a PCIe cable connector, push it in all the way and make sure that it does not come off. |
|
Figure 17-26 Connecting the PCIe Cables and CMUL
|
|
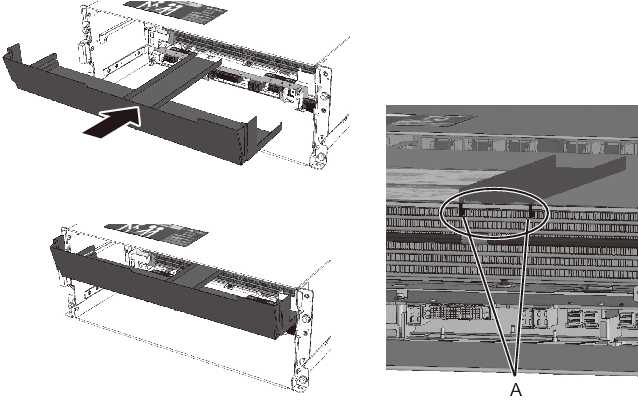
- Insert the CMU filler unit.
Insert the CMU filler unit into the server. Hook the claws at the bottom of the CMU filler unit (A in Figure 17-27) onto the top cover of the CMUL.
When the CMUU is mounted, this step is not necessary.
|
Figure 17-27 Inserting the CMU Filler Unit
|
|
< Previous Page | Next Page >