12.3.1 Enabling the Removal of a PCIe Card
12.3.1 Enabling the Removal of a PCIe Card
- Release the PCIe card from the system.
| Note - When you add a PCIe card or perform maintenance in the inactive or system-stopped state, this step is not necessary. |
| Note - To release a PCIe card from an active system by using PCI Hot Plug or PPAR DR, you need to make sure that the I/O resource of the PCIe card to be released or the I/O resource of the SPARC M12-2S to be released is not assigned to a logical domain. For details, see "9.3 Releasing I/O Resources From a Logical Domain" or "3.2 Operations and Commands Related to Logical Domain Configurations" in the Fujitsu SPARC M12 and Fujitsu M10/SPARC M10 Domain Configuration Guide. |
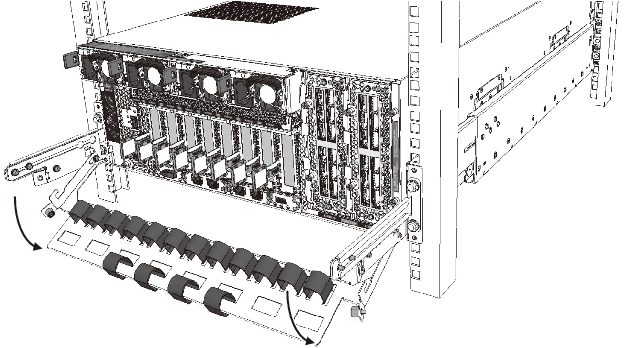
- Lower the cable support.
For details on handling the cable support, see "9.8.1 Lowering the Cable Support."
|
Figure 12-3 Lowering the Cable Support
|
|
- Remove the cable connected to the PCIe card.
Remove the cable connected to the PCIe card requiring maintenance. Record the cable connection locations before removing the cable to ensure that the system will be restored correctly.
| Note - When you add a PCIe card, this step is not necessary. Proceed to step 4. |
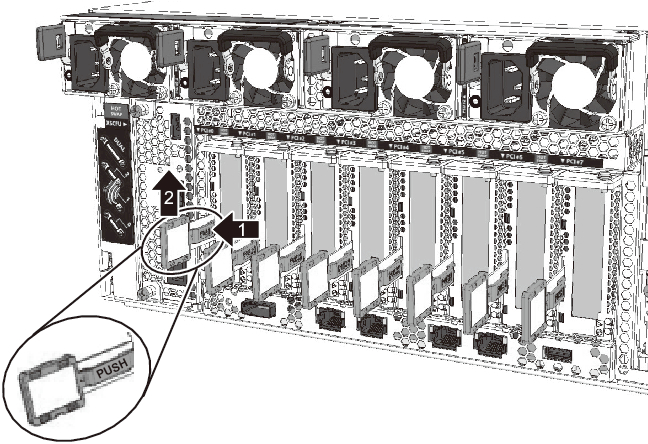
- Release the lock of the PCICS.
Release the lock of the PCICS by lifting the removal lever while pushing the latch at the base of the lever.
|
Figure 12-4 Releasing the Lock of the PCICS
|
 Releasing the Lock of the PCICS"/> Releasing the Lock of the PCICS"/>
|
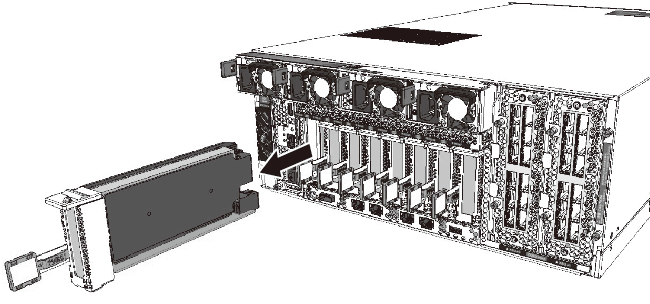
- Remove the PCIe card.
Hold the removal lever of the PCICS and remove the cassette.
|
Figure 12-5 Removing the PCIe Card
|
|
|

| Note - Place the removed PCICS on the grounded ESD mat to ground any static electricity. |
< Previous Page | Next Page >