11.4 Removing the XSCFU
11.4 Removing the XSCFU
This section describes the procedure for removing the XSCFU.
- Remove the LAN cables, USB memory, and other components connected to the XSCFU.
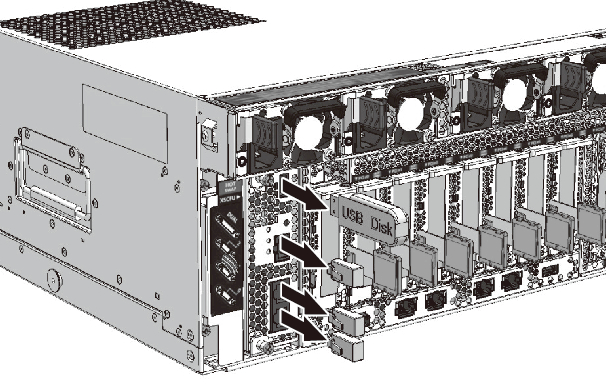
Remove the LAN cable, serial cable, and USB memory from the XSCFU.
|
Figure 11-2 Removing Cables and USB Memory
|
|
| Note - When removing the XSCFU of the SPARC M12-2S in a building block configuration, do not remove the power cord, XSCF DUAL control cable, or XSCF BB control cable. |
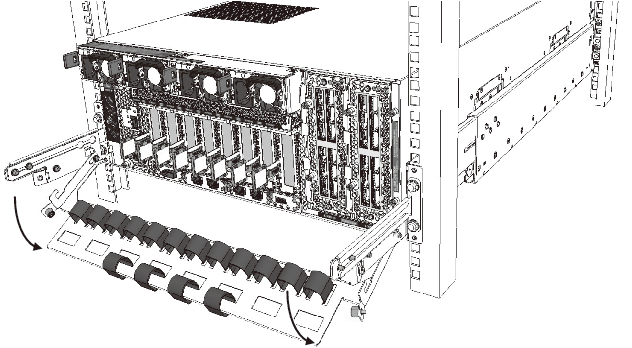
- Lower the cable support.
Loosen the screws securing the cable support, and then pull out the cable support to lower it.
For details on handling the cable support, see "9.8.1 Lowering the Cable Support."
If the cable support is not installed, this work is not required. Proceed to step 3.
|
Figure 11-3 Lowering the Cable Support
|
|
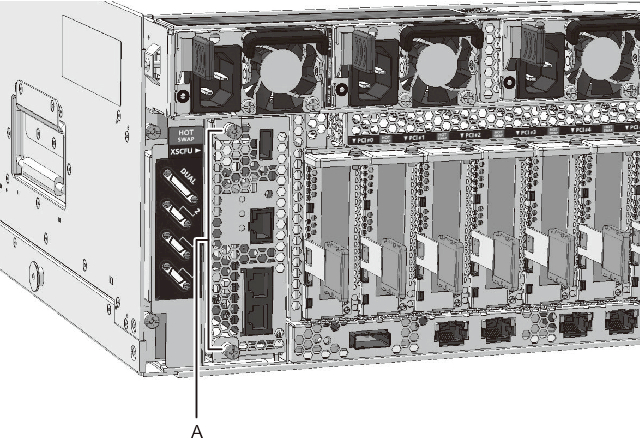
- Release the XSCFU.
Loosen the two fixing screws (A in Figure 11-4) of the XSCFU to release the levers.
|
Figure 11-4 Locations of the Fixing Screws in the Levers
|
|
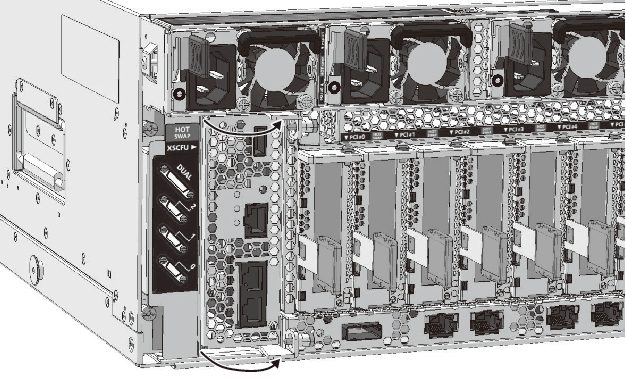
- Disconnect the XSCFU from the BPU.
Open the two levers of the XSCFU to the right to disconnect it from the BPU.
|
Figure 11-5 Disconnecting the Connector of the XSCFU
|
|
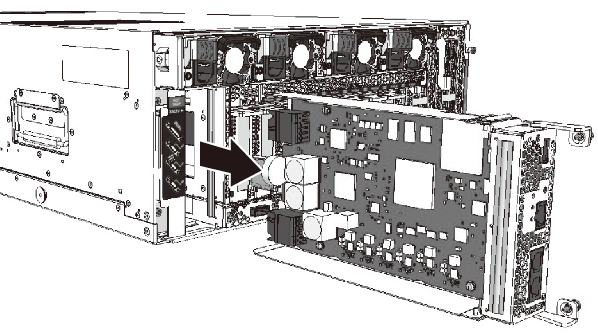
- Remove the XSCFU.
Remove the XSCFU with its levers open.
|
Figure 11-6 Removing the XSCFU
|
|
< Previous Page | Next Page >