16.6 Updating Firmware From XSCF Web
16.6 Updating Firmware From XSCF Web
This section describes how to update firmware from XSCF Web with an example for the SPARC M12-1.
- Log in to XSCF Web.
- Select [Menu] - [XSCF] - [Settings] - [Autologout] menu, and set a value of 30 minutes or longer for the [Time-out value] value.
If you will need to restore the original value, make a note of the current setting value.
| Note - If the XSCF shell timeout time is too short during XCP import or firmware update, "Session is invalid" may appear in the Web browser. For a building block configuration, set a value of 60 minutes or longer. |
- Select [Physical] - [MBU].
- Confirm that Status is Normal for the MBU on the [MBU Detail] screen as shown in Figure 16-2.
|
Figure 16-2 [MBU Detail] Screen
|
![Figure 16-2 [MBU Detail] Screen](img/865959ffe31b9260b.jpg)
|
- Select [Menu] - [Maintenance] - [Firmware Update].
- Confirm the version of the XCP firmware in operation, on the [Display Firmware Version] screen shown in Figure 16-3.
| Note - The firmware can be updated from XCP 3xxx to XCP 3xxx or from XCP 4xxx to XCP 4xxx. Do not update the firmware from XCP 3xxx to XCP 4xxx or from XCP 4xxx to XCP 3xxx. |
|
Figure 16-3 [Display Firmware Version] Screen
|
![Figure 16-3 [Display Firmware Version] Screen](img/702259ffe3571ce54.jpg)
|
- Import an XCP image file from the [Import Firmware] screen shown in Figure 16-4.
Specify the path of the XCP image file, and click the [Upload] button. Importing takes about five minutes.
| Note - If the overwrite warning message "An existing file will be overwritten, continue to process?" appears, click the [OK] button. |
| Note - If a message such as "An internal error has occurred" or "Error: insufficient free space" appears during XCP import, an XSCF firmware error or parts failure may have occurred. In this case, see "16.8 Trouble During Firmware Update" and solve the problem. |
|
Figure 16-4 [Import Firmware] Screen
|
![Figure 16-4 [Import Firmware] Screen](img/888259ffe3864a40b.jpg)
|
Importing is completed when "The file has been uploaded successfully." appears.
The XCP Version line on the [Import Firmware] screen shown in Figure 16-5 is updated. Confirm that it displays the firmware version of the imported XCP image file.
The XCP Version line on the [Import Firmware] screen shown in Figure 16-5 is updated. Confirm that it displays the firmware version of the imported XCP image file.
|
Figure 16-5 [Import Firmware] Screen After Importing Ends
|
![Figure 16-5 [Import Firmware] Screen After Importing Ends](img/594859ffec166a67c.jpg)
|
- Check the [XCP Update] screen shown in Figure 16-6 to see whether the imported XCP image file can be used to update the firmware.
Click the [Check] button and specify the firmware version in the pop-up window to start the file check. If "The XCP file has been checked successfully." appears, the file can be used for the firmware update.
|
Figure 16-6 XCP Image File Check From the [XCP Update] Screen
|
![Figure 16-6 XCP Image File Check From the [XCP Update] Screen](img/206259ffed3b46773.jpg)
|
- Update the firmware from the [XCP Update] screen shown in Figure 16-7.
Click the [Update] button and specify the firmware version in the pop-up window to start the firmware update. The update takes about 30 minutes.
| Note - In a building block configuration, the update tales about 60 minutes. |
| Note - If a message such as "An internal error has occurred" or "Internal error" appears during firmware update, an XSCF firmware error or parts failure may have occurred. In this case, see "16.8 Trouble During Firmware Update" and solve the problem. |
|
Figure 16-7 Firmware Update From the [XCP Update] Screen
|
![Figure 16-7 Firmware Update From the [XCP Update] Screen](img/104459ffee09f3570.jpg)
|
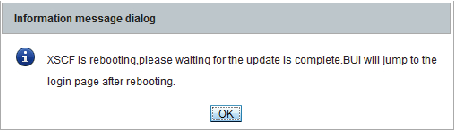
Partway through the update, the XSCF is rebooted, and the XSCF session is disconnected.
The message shown in Figure 16-8 is output.
The message shown in Figure 16-8 is output.
|
Figure 16-8 XSCF reboot message
|
|
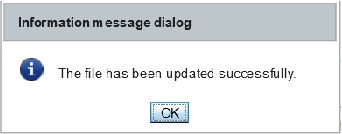
The message "The file has been updated successfully" shown in Figure 16-9 also appears partway through the update. At this point in time, the firmware update is not yet complete.
|
Figure 16-9 Message During the Update
|
|
- Log in to XSCF Web again.
- Check the firmware update message on the [Log Monitor Message] screen in the bottom frame of the window shown in Figure 16-10.
|
Figure 16-10 [Log Monitor Message] Screen
|
![Figure 16-10 [Log Monitor Message] Screen](img/734859fff29941aaa.jpg)
|
If the message "XCP update has been completed" appears, the XCP firmware update has completed.
| Note - A message similar to "XSCF update has been completed" or "CMU update has been completed" will appear on the SPARC M10. However, the update of all the XCP firmware will not have completed by the time the message appears. |
| Note - To safely update the firmware, do not perform power operations for physical partitions, reboot the XSCF, etc. until you have confirmed the "XCP update has been completed" message on the completion of the XCP firmware update. For details, see "16.2.1 Notes on Update." |
| Note - In a building block configuration: The states of the master and standby XSCFs in a building block configuration immediately after the XCP firmware update is completed have been inverted from their pre-update states. The master and standby XSCFs are switched to return them to their original states. The automatic switching takes about 10 minutes. |
- Set the XSCF time.
If the XSCF time has shifted, the logical domain time may shift when the physical partition is powered on.
For details on how to set the XSCF time, see "6.1.2 Setting the XSCF Time Before System Startup." Take action from the associated XSCF Web menu.
- Confirm that the firmware version is up to date on the [Display Firmware Version] screen as shown in Figure 16-11.
|
Figure 16-11 [Display Firmware Version] Screen
|
![Figure 16-11 [Display Firmware Version] Screen](img/398159fff5f130604.jpg)
|
Note - Power of the physical partition is on: The target CMU firmware has not been updated at this point in time. Therefore, the message does not appear for the CMU firmware. To complete the CMU firmware update after the XCP firmware update is completed, power off and on the physical partition. |
Note - In the case of a logical domain configuration, execute the ldm add-spconfig command of Oracle VM Server for SPARC in the control domain to save the latest configuration information in the XSCF before powering off the physical partition. For details, see "6.2.2 Saving the Logical Domain Configuration Information before System Stop" and "10.11.1 Saving/Displaying Logical Domain Configuration Information." |
Note - On the SPARC M10, if firmware is updated by powering on the physical partition, only the current bank of the CMU firmware is updated. With the CMU firmware, where control is handled only by the current bank, there is no problem with an outdated version of the reserve bank. If the firmware is updated by stopping the power of a physical partition, then both the reserve bank and current bank of the CMU firmware are updated. For the CMU firmware version that corresponds to the XCP version, see "Existing XCP Firmware Versions and Support Information" in the latest Product Notes for your server. |
- If the auto logout time has been changed, select [Menu] - [XSCF] - [Settings] - [Autologout] menu, and restore the original value in [Time-out value].
< Previous Page | Next Page >