10.4 Removing an Internal Disk
10.4 Removing an Internal Disk
This section describes the procedure for removing an internal disk. Perform reduction using the same procedure.
Make the internal disk ready for removal before attempting to remove it. For details, follow the procedure in "Chapter 7 Maintenance Flow."
Make the internal disk ready for removal before attempting to remove it. For details, follow the procedure in "Chapter 7 Maintenance Flow."
|

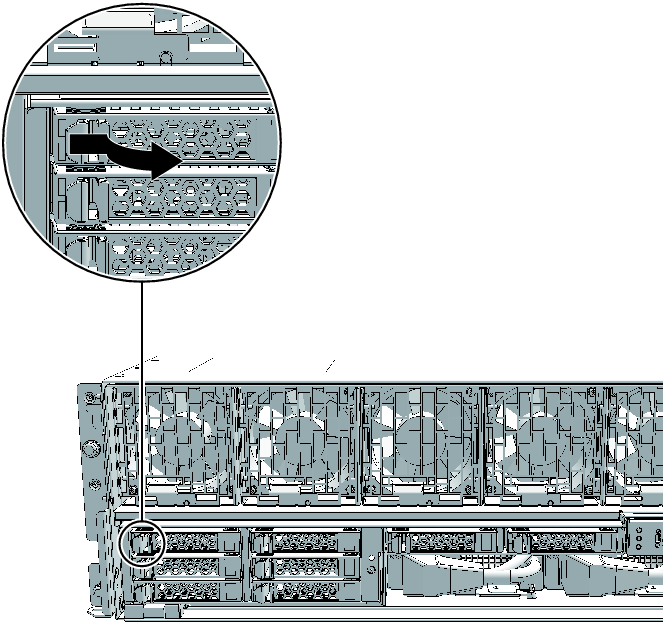
- Push the knob on the internal disk to unlock it and then raise the lever to a 45-degree angle.
|
Figure 10-3 Knob on internal disk
|
|
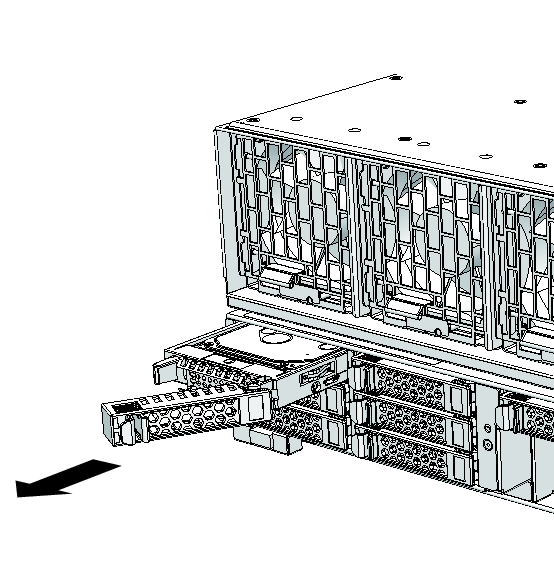
- Hold the lever and pull out the internal disk by about 3 cm (1.2 in.)
| Note - When performing active/hot maintenance, at this point wait until the motor stops rotating (about 1 minute). |
|
Figure 10-4 Removing an internal disk
|
|
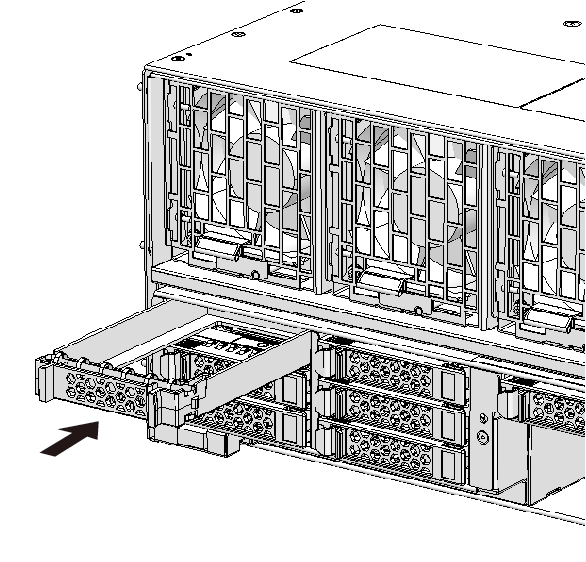
- Carefully remove the internal disk from its slot.
| Note - Place the removed internal disk on the grounded antistatic ESD mat. |
- When reducing an internal disk, install the internal disk filler unit in the slot from which the disk was removed.
|
Figure 10-5 Installing the disk filler
|
|
< Previous Page | Next Page >