3.3.2 Fastening the Rack
3.3.2 Fastening the Rack
When installing the rack, regardless of whether it will be fastened and anchored to the building, be sure to adjust the leveling feet as described below for installation. Keep the rack horizontal with the leveling feet, and be sure to keep the casters above the floor level by about 2 mm (0.1 in.). Do not let the casters support the weight of the rack.
When installing the rack in a fixed manner
- Fastening with the quakeresistant options kit
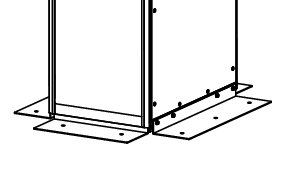
Install the quakeresistant options kit around the rack (front/rear, left/right), using the holes of the quakeresistant kit to fasten the rack to the slab (building floor surface). The quakeresistant options kit needs to be ordered separately.
|
Figure 3-14 Fastening With the Quakeresistant Options Kit
|
|
- Fastening Using a Leveling Foot
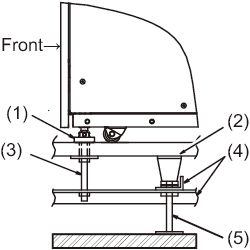
Using the screw hole of size M20, depth 17 mm (0.7 in.), provided at the bottom face of a leveling foot of the rack, fasten the rack to the slab (building floor surface).
|
Figure 3-15 Example of Fastening With a Leveling Foot
|
|
| Number in Figure | Description |
|---|---|
| 1 | Leveling foot |
| 2 | Free-access floor |
| 3 | Bolt (M20) |
| 4 | Frame |
| 5 | Supporting column |
When installing the rack in a non-fixed manner
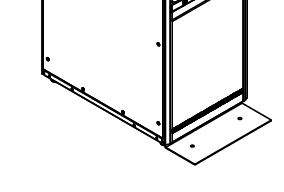
- Installing using the toppling-prevention stabilizer
| Note - Attach the stabilizer as a measure to prevent the rack from toppling over during system maintenance. For installation without the rack fixed in place, be sure to install the stabilizer before installation. The image of installing it on the rack is as follows. |
|
Figure 3-16 Installation Image of L-Type Stabilizer
|
|
|

< Previous Page | Next Page >