
16.3.2 Removing the I/O Board
16.3.2 Removing the I/O Board
- Remove the six cables connected to the I/O board.
| Note - Record the positions of the cables before removing them to ensure that they are reinstalled correctly. |
|
Figure 16-2 I/O Board Cables
|
 I/O Board Cables"/> I/O Board Cables"/>
|
- Loosen the two screws securing the I/O board.
|
Figure 16-3 I/O Board Screws
|

|
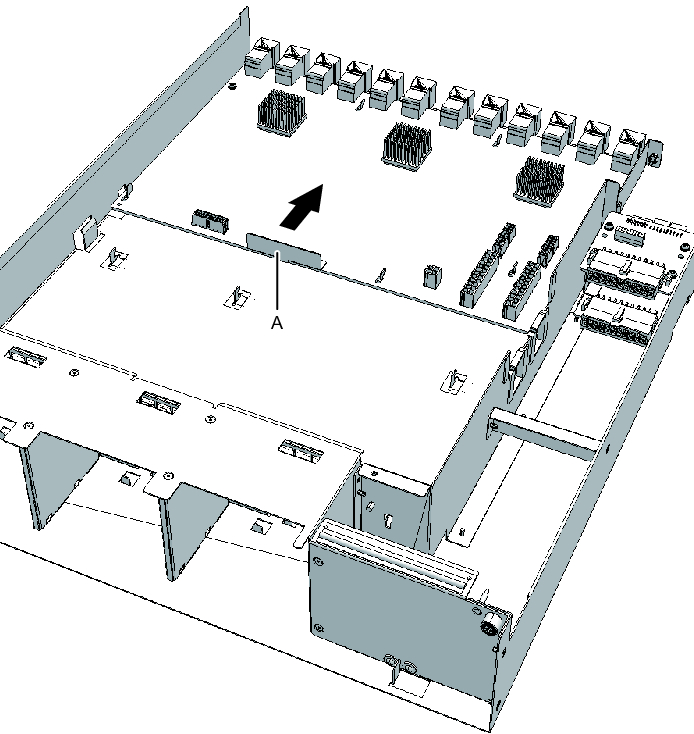
- Hold and slide the guide (A in Figure 16-4) of the I/O board toward the rear of the chassis and then remove the board.
| Note - Do not remove the I/O board by holding its connectors. Note - Place the removed I/O board on the grounded ESD mat to eliminate any static electricity. |
|
Figure 16-4 Removing the I/O Board
|
|
< Previous Page | Next Page >