9.3 Removing an HDD/SSD
9.3 Removing an HDD/SSD
This section describes the procedure for removing an HDD/SSD. Use the same procedure for reduction too.
In HDD/SSD expansion, to install an HDD/SSD in a slot, first remove the internal storage filler unit from the slot.
Enable removal of the HDD/SSD before attempting to remove it. For details, see "Chapter 7 Maintenance Flow."
In HDD/SSD expansion, to install an HDD/SSD in a slot, first remove the internal storage filler unit from the slot.
Enable removal of the HDD/SSD before attempting to remove it. For details, see "Chapter 7 Maintenance Flow."
|

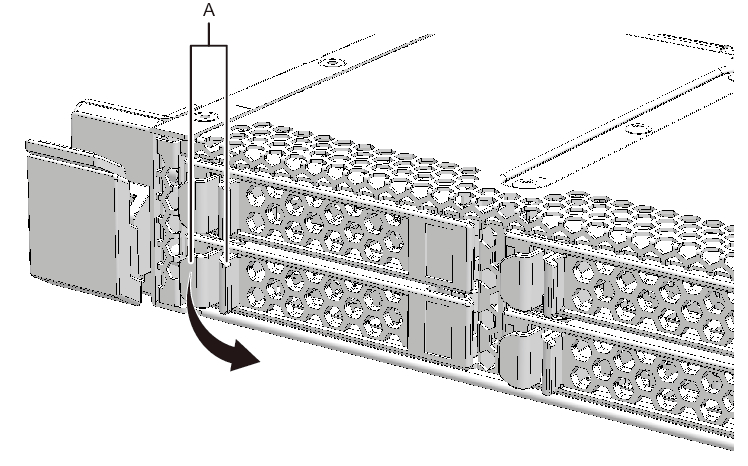
- Push the latch (A in Figure 9-2) of the HDD/SSD to release the lock and open the lever.
|
Figure 9-2 HDD/SSD Latch
|
|
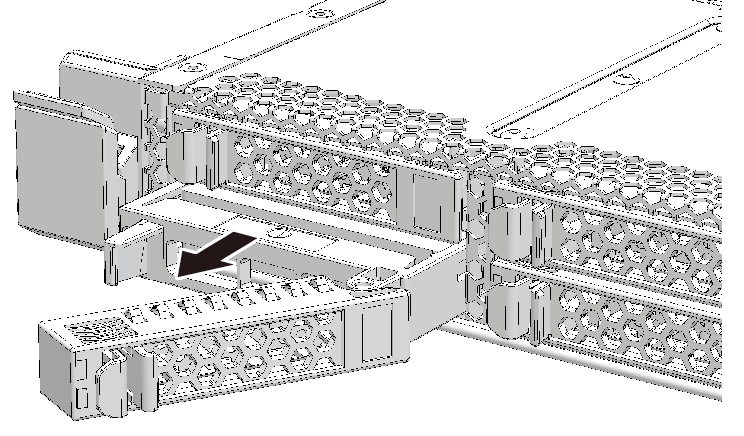
- Hold the lever and pull the HDD/SSD out about 2 to 3 cm (0.8 to 1.2 in.).
| Note - When performing active/hot maintenance, hold this position until the motor rotation stops (about 1 minute). |
|
Figure 9-3 Removing an HDD/SSD
|
|
- Carefully remove the HDD/SSD from its slot.
| Note - Place the removed HDD/SSD on a grounded ESD mat to ground any static electricity. Note - In HDD/SSD reduction, after removing an HDD/SSD from a slot, install an internal storage filler unit in the slot. |
< Previous Page | Next Page >