9.3 Removing an Internal Disk
9.3 Removing an Internal Disk
This section describes the procedures for removing internal disks. Perform reduction using the same procedure.
For expansion, remove the internal disk filler unit from the slot in which the internal disk is to be installed.
Make the internal disk ready for removal before attempting to remove it. For details, see "Chapter 7 Maintenance Flow."
For expansion, remove the internal disk filler unit from the slot in which the internal disk is to be installed.
Make the internal disk ready for removal before attempting to remove it. For details, see "Chapter 7 Maintenance Flow."
|

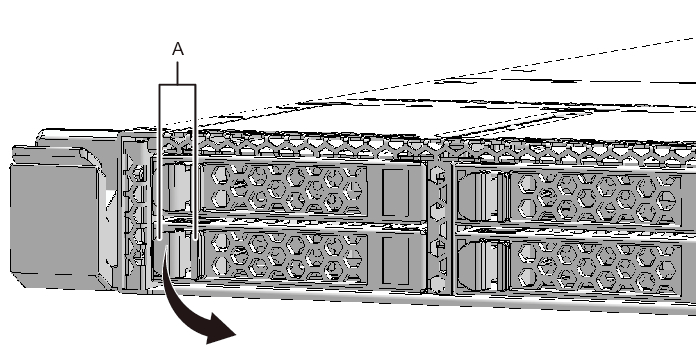
- Push the knob (A in Figure 9-2) of the internal disk to release the lock and open the lever.
|
Figure 9-2 Knob of internal disk
|
|
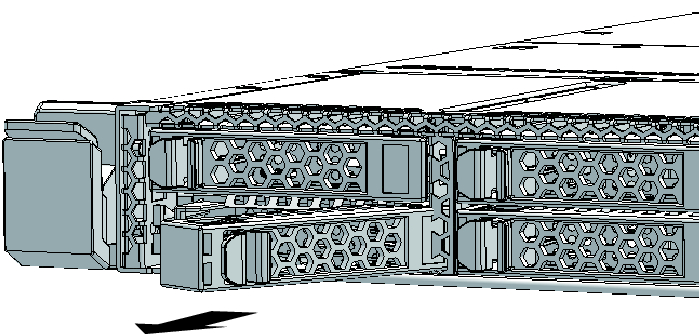
- Hold the lever and pull the internal disk out about 2 to 3 cm (0.8 to 1.2 in.).
| Note - When performing active/hot maintenance, hold this position until the motor rotation stops (about 1 minute). |
|
Figure 9-3 Removing an internal disk
|
|
- Carefully remove an internal disk from its slot.
| Note - Place the removed internal disk on the grounded antistatic ESD mat. |
| Note - When you reduce an internal disk, install the filler unit into the slot from which you removed the internal disk. |
< Previous Page | Next Page >