13.3.2 Removing the cable kit
13.3.2 Removing the cable kit
- Remove the three (3) cables from the motherboard unit that connect the PSU backplane to the motherboard unit.
| Note - Record the positions of the cables before removing them to ensure that they are reinstalled correctly. |
|
Figure 13-2 Cables of the motherboard unit
|

|
- Release the cable guide lock.
For details, see "5.8.7 Releasing the cable guide lock."
If the cable guide does not have a lock, proceed to step 3.
- Remove one cable of the HDD backplane which connects the PSU backplane and the HDD backplane.
|
Figure 13-3 HDD backplane cables
|
|
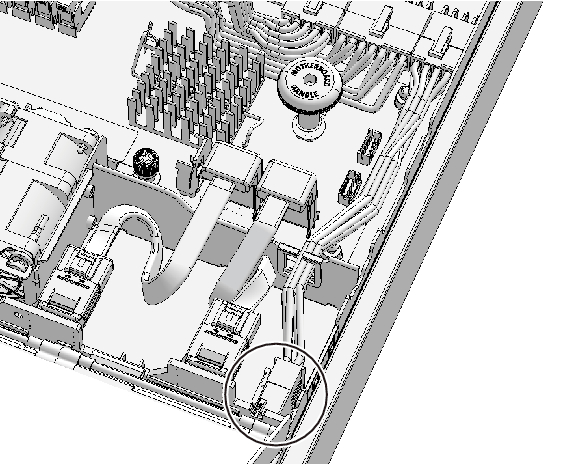
- Loosen the screw that secures the PSU backplane.
|
Figure 13-4 Screw securing the PSU backplane
|
|
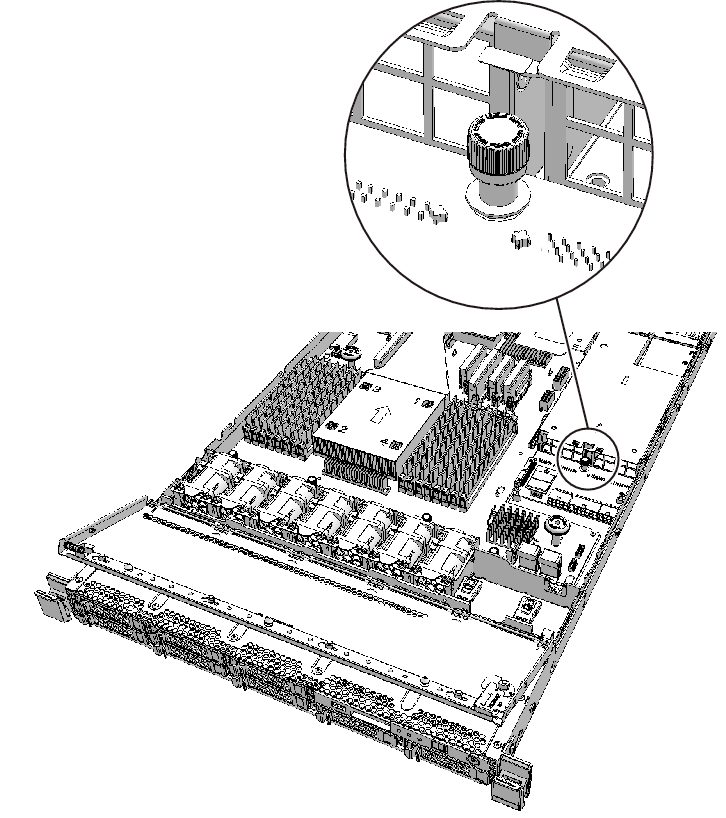
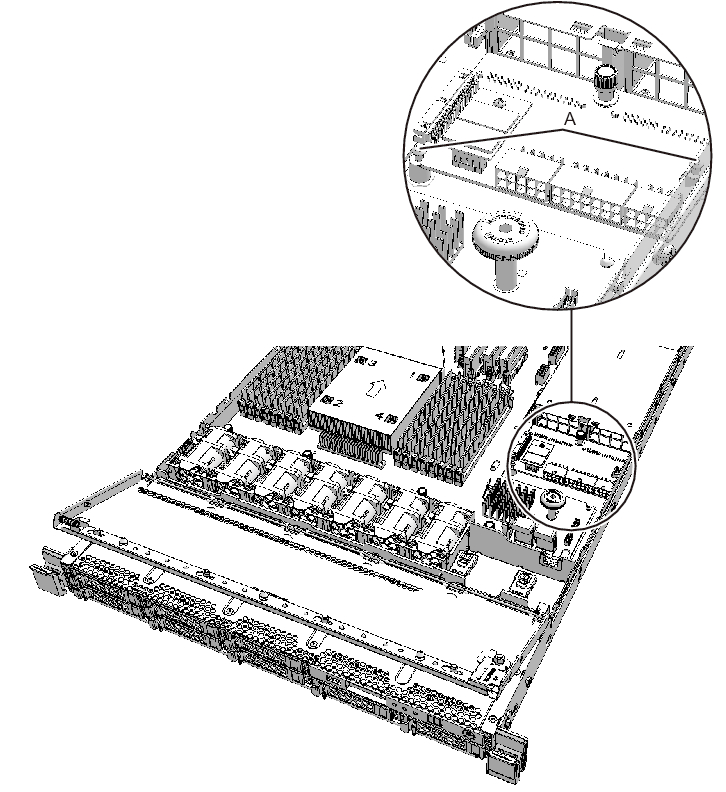
- Slide the PSU backplane toward the rear of the chassis to release it from the two fixing pins (A in Figure 13-5).
|
Figure 13-5 Fixing pins of PSU backplane
|
|
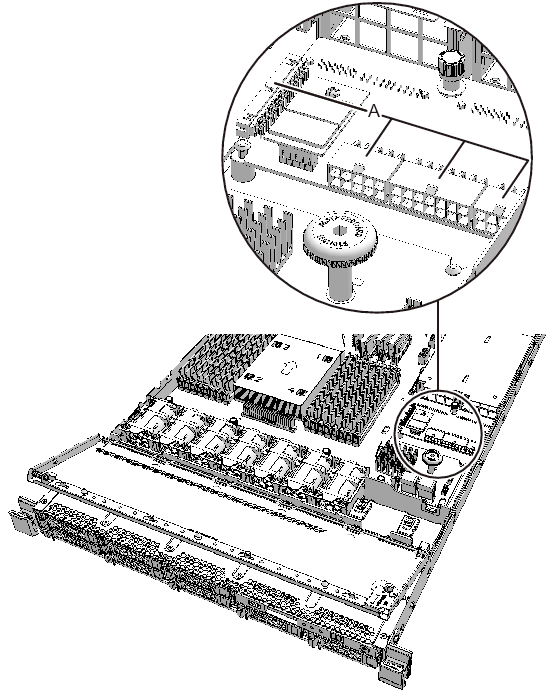
- Lift the PSU backplane and disconnect the four cables (A in Figure 13-6) connected to the PSU backplane.
| Note - Record the positions of the cables before removing them to ensure that they are reinstalled correctly. |
| Note - Place the removed PSU backplane on a grounded antistatic ESD mat. |
|
Figure 13-6 PSU backplane cables
|
|
< Previous Page | Next Page >