16.5.3 Removing the motherboard unit
16.5.3 Removing the motherboard unit
|

- Remove all the fan units.
For details, see "15.3.2 Removing a fan unit."
| Note - Make a note of the positions of the fan units before removing them to ensure that they are reinstalled correctly. |
- Remove all the PCI Express (PCIe) risers.
For details, see "8.3.2 Removing a PCI Express riser."
Removing the PCIe risers enables you to easily remove the cables from the PSU backplane.
| Note - Make a note of the mounting locations of the PCIe risers before removing them to ensure that they are reinstalled correctly. |
- Remove all the memory.
For details, see "16.5.2 Removing memory."
| Note - Make a note of the mounting locations of memory before removing them to ensure that they are reinstalled correctly. |
- Release the cable lock guide.
For details, see "5.8.7 Releasing the cable guide lock."
If the cable guide does not have a lock, proceed to step 3.
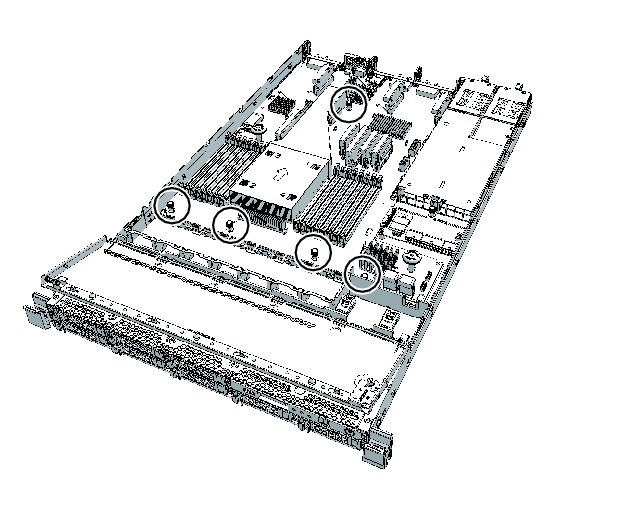
- Remove the cables connected to the motherboard unit.
The following cables should be removed:a. Three (3) cables on the motherboard unit that connect the PSU backplane to the motherboard unitb. One (1) cable that connects the PSU backplane to the HDD backplane
The cable does not have to be removed from the HDD backplane.c. Two (2) cables that connect the HDD backplane to the motherboard unitd. Two (2) cables that connect the operation panel to the motherboard unit
| Note - Record the positions of the cables before removing them to ensure that they are reinstalled correctly. |
|
Figure 16-4 Cables of the motherboard unit
|

|
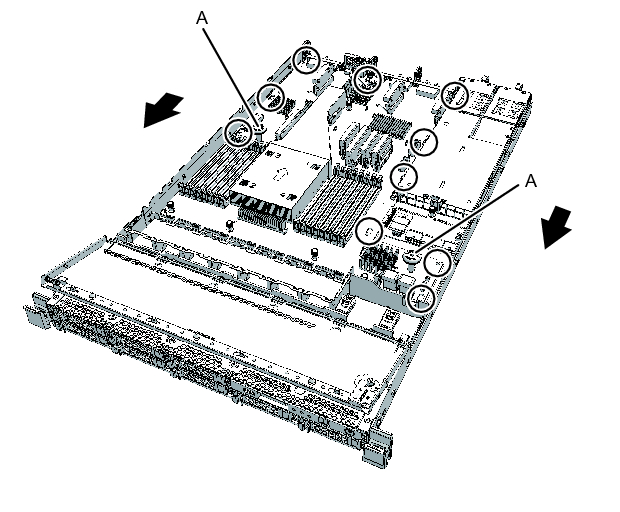
- Loosen the five (5) screws securing the motherboard unit.
|
Figure 16-5 Screws on the motherboard unit
|
|
- Hold the handles (A in Figure 16-6) of the motherboard unit and slide it out toward the front of the chassis.
Check that the motherboard unit is disengaged from the 10 fixing pins.
|
Figure 16-6 Motherboard unit fixing pins
|
|
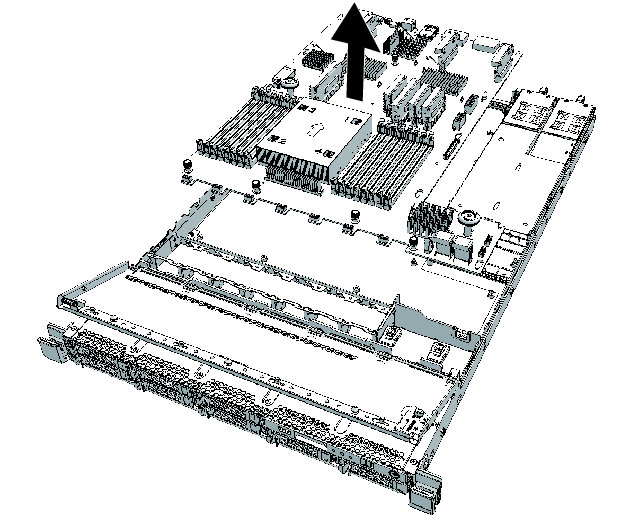
- Pull up the motherboard unit to remove it.
| Note - Place the removed motherboard unit on the grounded antistatic ESD mat. |
|
Figure 16-7 Removal of the motherboard unit
|
|
< Previous Page | Next Page >