16.6.1 Installing the motherboard unit
16.6.1 Installing the motherboard unit
|

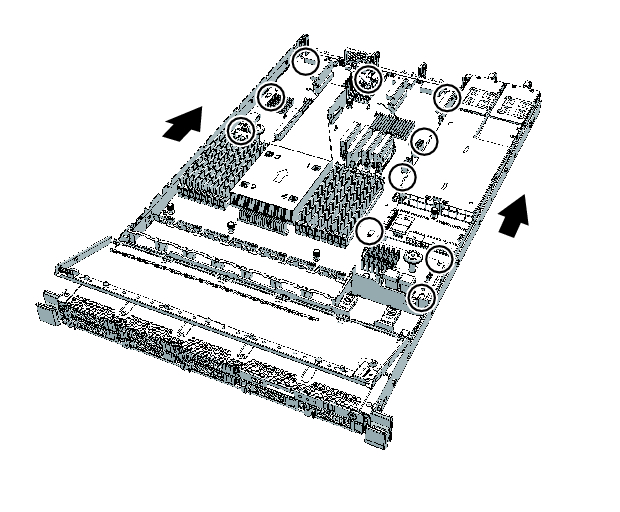
- Hold the handles on the motherboard unit and install the motherboard unit in the chassis.
Install it from the front of the chassis, aligning it with the mounting location. - Confirm that the 10 fixing pins are inserted into the motherboard unit, and then slide the motherboard unit toward the rear of the chassis.
|
Figure 16-12 Motherboard unit fixing pins
|
|
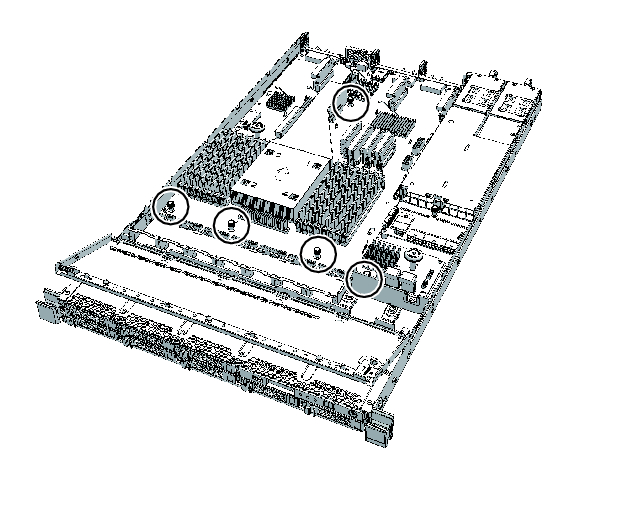
- Tighten the five (5) screws securing the motherboard unit.
|
Figure 16-13 Screws on the motherboard unit
|
|
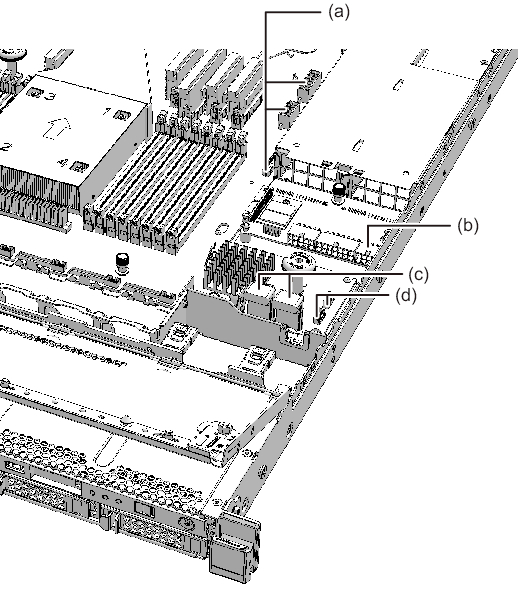
- Connect the cables to the motherboard unit.
The following cables are to be installed:a. Three (3) cables on the motherboard unit that connect the PSU backplane to the motherboard unitb. One (1) cable that connects the PSU backplane to the HDD backplane
Connect the cable to the PSU backplane.c. Two (2) cables that connect the HDD backplane to the motherboard unitd. Two (2) cables that connect the operation panel to the motherboard unit
| Note - Reinstall the cables in their original positions by referring to the notes that you made before the start of maintenance. |
|
Figure 16-14 Cables of the motherboard unit
|
|
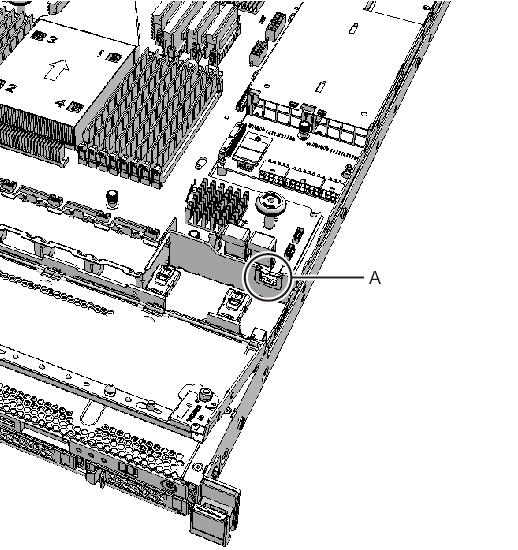
- Store the cables of the motherboard unit in the cable guide (A in Figure 16-15).
|
Figure 16-15 Location of the cable guide
|
|
- There are two types of cable guides. The procedure varies depending on the type. For the types of cable guides, see Figure 6-1.
- Type A
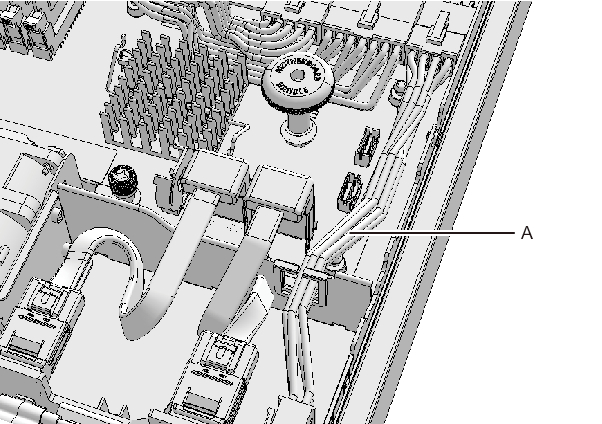
- a. Working from the upper part of the cable guide, store the cable (red/black) (A in Figure 16-16) connecting the HDD backplane to the PSU backplane in the guide.
|
Figure 16-16 Storing cables (red/black)
|
|
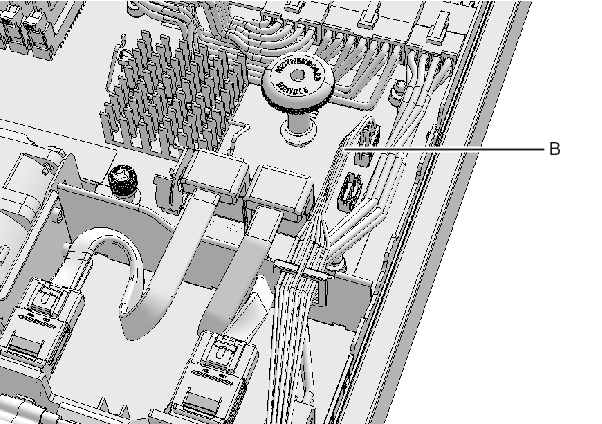
- b. Store in the cable guide the cable (black/yellow/white) (B in Figure 16-17) connecting the operation panel to the motherboard unit.
|
Figure 16-17 Storing cables (black/yellow/white)
|
|
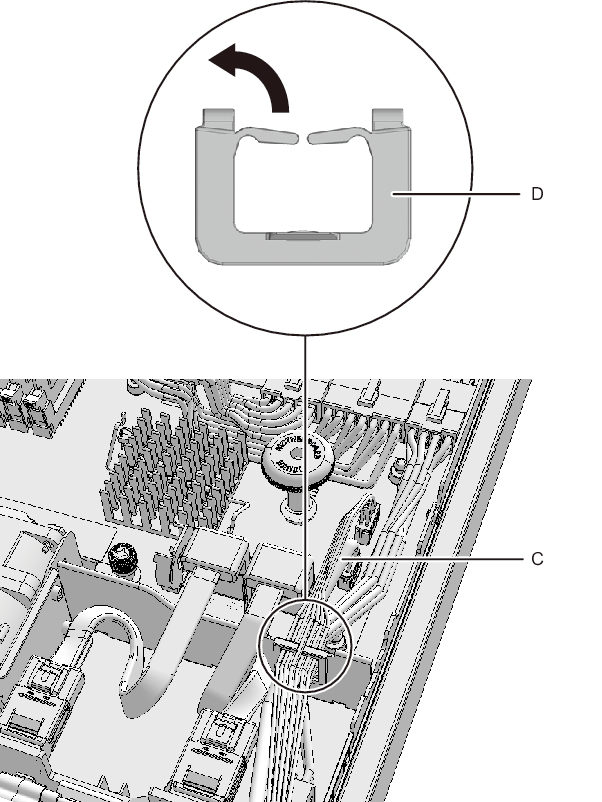
- c. From the middle of the clamp in the upper part of the cable guide, pull up one side of the clamp to open it (D in Figure 16-18). Then, store in the cable guide the cable (black) (C in Figure 16-18) connecting the operation panel to the motherboard unit.
|
Figure 16-18 Storing a cable (black)
|
|
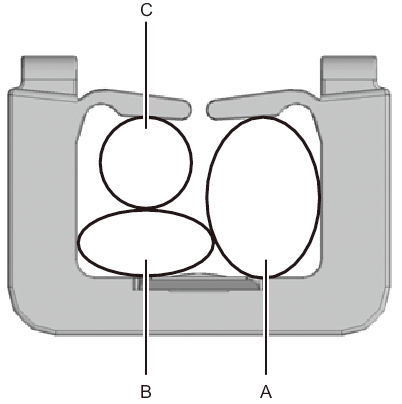
- d. Confirm that three cables are stored in the cable guide.
A in Figure 16-19: Cables (red/black) connecting the PSU backplane to the HDD backplane
B in Figure 16-19: Cables (black/yellow/white) connecting the operation panel to the motherboard unit
C in Figure 16-19: Cable (black) connecting the operation panel to the motherboard unit
|
Figure 16-19 Cable guide after the cables are stored as viewed from the front of the chassis
|
|
- Type B
- a. Store in the cable guide one cable (red/black) connecting the PSU backplane to the HDD backplane and two cables (black and black/yellow/white) connecting the operation panel to the motherboard unit.b. Lock the cable guide.
For details, see "6.1.1 Locking the cable guide."
- Install the removed memory on the new motherboard unit.
For details, see "16.6.2 Installing memory."
| Note - Reinstall the memory in their original locations by referring to the notes you made before the start of maintenance. |
- Install all the PCIe risers.
For details, see "8.4.2 Installing a PCIe riser."
| Note - Reinstall the PCIe risers in their original locations by referring to the notes that you made before the start of maintenance. |
- Install all the fan units.
For details, see "15.4.1 Installing a fan unit."
| Note - Reinstall the fan units in their original locations by referring to the notes that you made before the start of maintenance. |
< Previous Page | Next Page >