17.5.1 Installing Memory
17.5.1 Installing Memory
This section describes the procedure for installing memory in the CMU.
| Note - To add memory or change the type of memory installed, follow the instructions in "2.2.1 Memory Installation Rules." |
| Note - When replacing only the CMU, make sure that the memory mounting position is the same before and after the replacement of the CMU. |
- Install the memory.
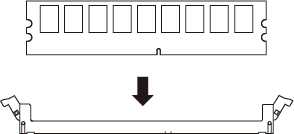
Check that the latches on both sides of the memory slot into which to install memory are open. Align the memory key grooves with the memory slot key, and place the memory in the memory slot.
|
Figure 17-19 Installing Memory
|
|
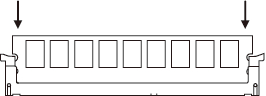
- Secure the memory.
Push both ends of the memory until the latches of the memory slot close.
|
Figure 17-20 Securing the Memory
|
|
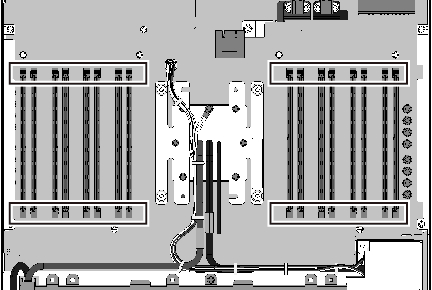
| Note - Confirm that the latches on both ends of the memory slot are closed. You need to make sure that there is no unevenness (Figure 17-21) between the latches when seen from directly above. If the latches are not closed, remove the memory and try installing it again. |
|
Figure 17-21 Installing Memory (No Unevenness)
|
|
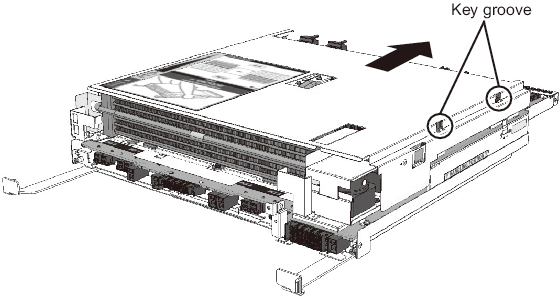
- Install the to cover to the CMUL.
Place the top cover on the CMUL with its key aligned with the key grooves on both sides of the CMUL. Then, slide the top cover in the direction of the arrow shown in Figure 17-22, and lock the latch to secure the cover. When locked, the latch "clicks".
Note that this step is not necessary for the CMUU.
|
Figure 17-22 Installing the Top Cover on the CMUL
|
|
< Previous Page | Next Page >