17.4.1 Enabling the Removal of the CMU
17.4.1 Enabling the Removal of the CMU
To enable the removal of the CMU, you need to remove the FANBPU, HDDBPU, PCIe cards, and XBU from the server. This section describes the procedure for removing the other units from the server before removing the CMU.
- Place the server in the cold state.
For details on handling power cords, see "9.8.2 Removing the Power Cords."
- Lower the cable support.
For details on handling the cable support, see "9.8.1 Lowering the Cable Support."
- The CMUL may have a LAN cable, SAS cable, USB cable, or other cable connected to it. Remove them all.
|

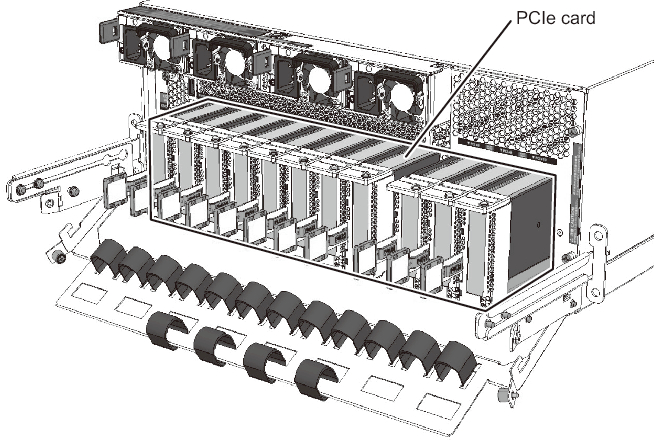
- Pull out the PCIe card from the server.
For details on handling the PCIe card, see "12.3.1 Enabling the Removal of a PCIe Card."
|
Figure 17-3 Pulling Out the PCIe Card
|
|
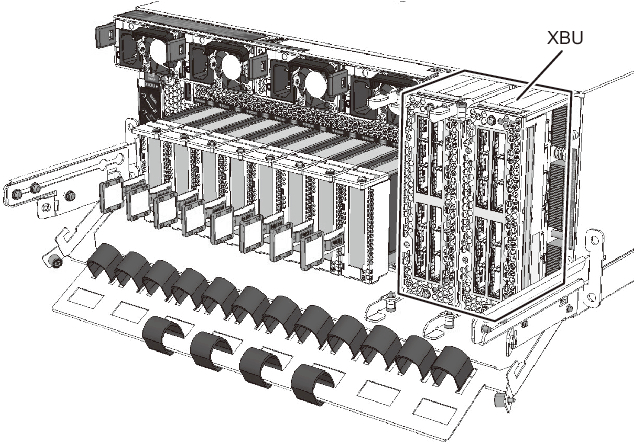
- Pull out the XBU from the server.
- You can pull the XBU out of the CMU when you open its removal lever. For details on handling the XBU, see "20.3 Removing an XBU."
Note that, for the SPARC M12-2, this step is not necessary. Proceed to step 6.
|
Figure 17-4 Pulling Out the XBU
|
|
- Remove the front cover.
For the procedure for removing the front cover, see "9.8.3 Removing the Front Cover."
| Note - The serial number of the server is printed on a label affixed on the front cover. Store this cover such that it is not mixed up with the front covers of other SPARC M12 units. |
- Remove the FANUs.
For the procedure for removing the FANUs, see "14.3.1 Removing a FANU."
|
Figure 17-5 Removing the FANUs
|

|
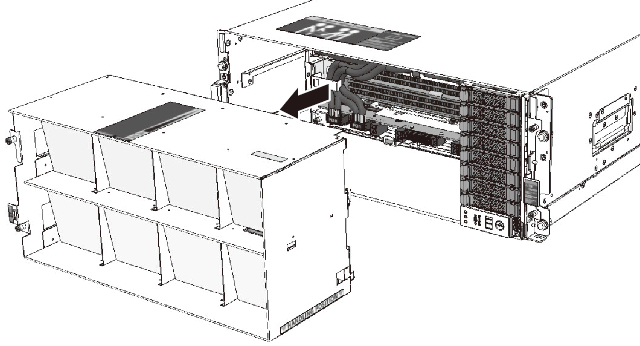
- Remove the FANBPU.
For the procedure for removing the FANBPU, see "14.3.2 Removing the FANBPU."
|
Figure 17-6 Removing the FANBPU
|
|
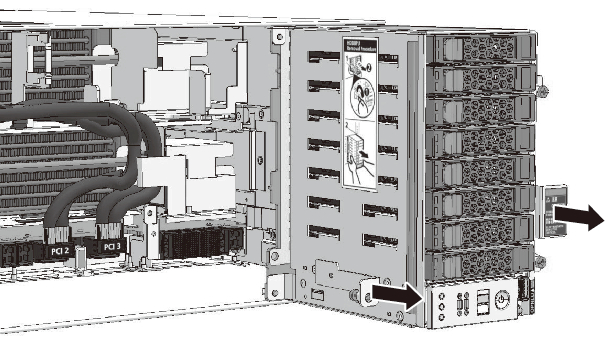
- Remove the HDDBPU.
For the procedure for removing the HDDBPU, see "16.3.2 Removing the HDDBPU."
|
Figure 17-7 Removing the HDDBPU
|
|
< Previous Page | Next Page >