17.4.2 Removing the CMU
17.4.2 Removing the CMU
This section describes the procedure for removing the CMU.
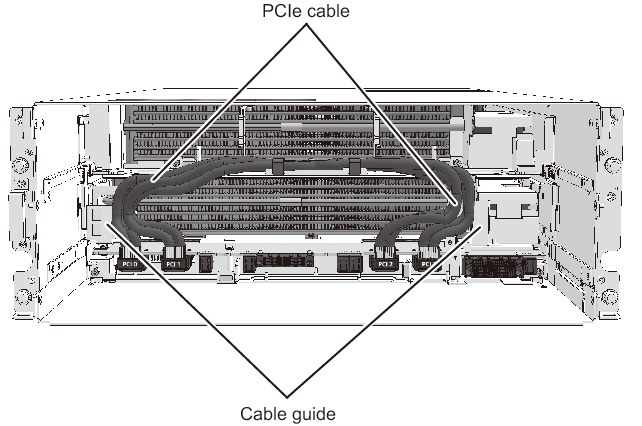
- Remove the PCIe cables from the cable guide.
Remove the PCIe cables from the cable guide. When the CMUU is not mounted, this step is not necessary. Proceed to step 6.
|
Figure 17-8 Removing the PCIe Cables From the Cable Guide
|
|
|

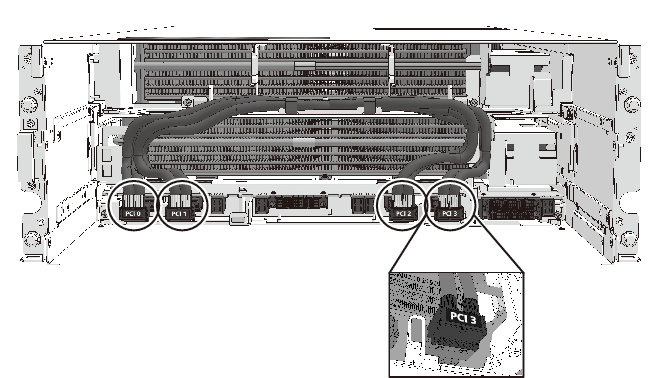
- Remove the PCIe cables from the CMUL.
The latch of the PCIe cable connector is located on the underside of the connector. Pull out the connector by pinching the connector hood while pushing the latch.
|
|
Figure 17-9 Removing the PCIe Cable Connectors
|
|
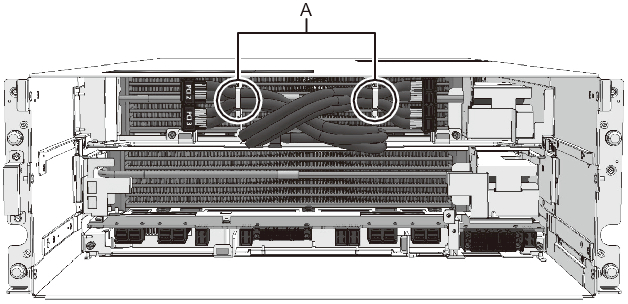
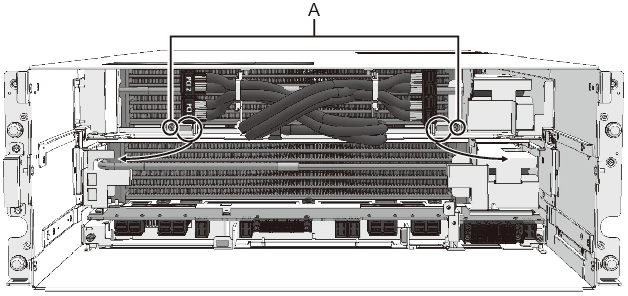
- Bundle the PCIe cables using the cable clamps of the CMUU.
Bundle the PCI0 and PCI1 cables and the PCI2 and PCI3 cables into pairs respectively using the cable clamps (A in Figure 17-10) in such a way that they cross each other.
|
Figure 17-10 Securing the PCIe Cables With the Cable Clamp
|
|
|
- Loosen the fixing screws of the CMUU levers.
- Loosen the fixing screws (A in Figure 17-11) of the CMUU levers.
Note that, if you do not remove the CMUU, this step is not necessary. Proceed to step 6.
|
Figure 17-11 Fixing Screws of the CMUU Levers
|
|
|
- Remove the CMUU.
| Note - To remove the CMU filler unit, proceed to step 6. |
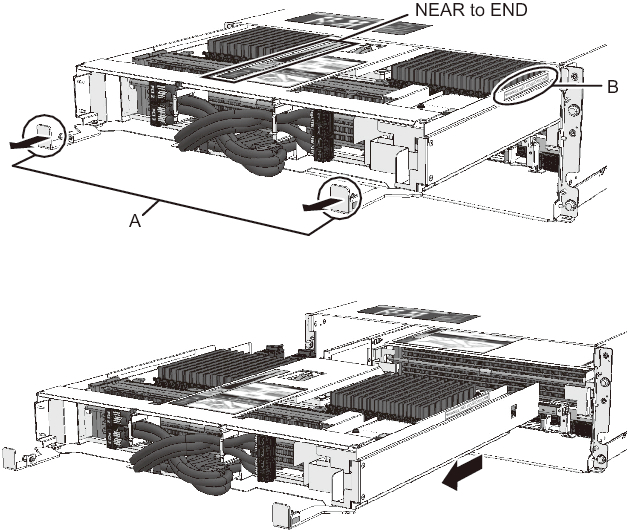
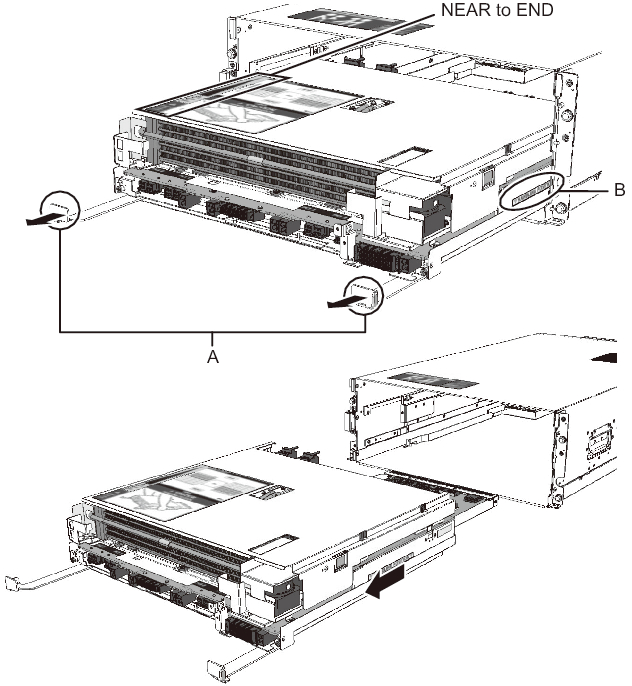
- a. Hold the CMUU levers (A in Figure 17-12), pull out the CMUU to the tip of "NEAR to END", and then hold it at "HANDLING POSITION" (B in Figure 17-12) on its side.
- b. Hold the CMUU at HANDLING POSITION, and remove it from the server.
|
Figure 17-12 Removing the CMUU
|
|
| Note - When removing the CMUU, be sure to bundle the PCIe cables using the cable clamps. |
| Note - If you do not remove the CMUL, the following steps are not necessary. |
- Remove the filler unit.
When the filler unit is not mounted, this step is not necessary. Proceed to step 7.
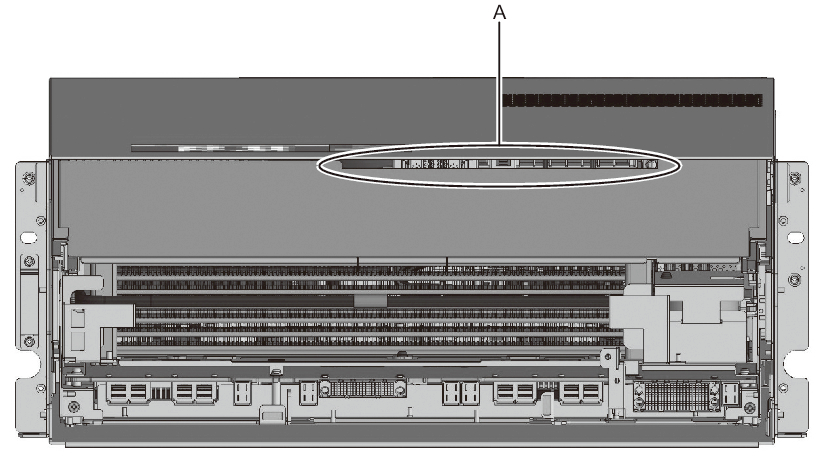
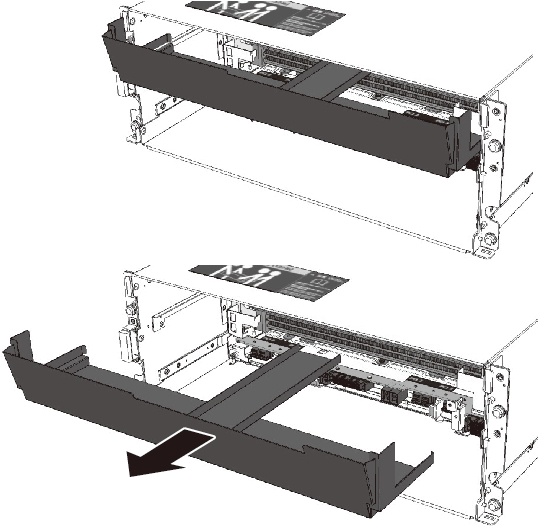
- a. Hook your fingers over the top part of the CMU filter unit (A in Figure 17-13) by inserting them into the gap there.b. Pull out the CMU filler unit by pulling it toward you.
|
Figure 17-13 Gap in the Top Part of the CMU Filler Unit
|
|
|
Figure 17-14 Removing the CMU Filler Unit
|
|
| Note - When removing the CMU filler unit, hold it with both hands so that you do not drop it. |
| Note - If you do not remove the CMUL, the following steps are not necessary. |
- Loosen the fixing screws of the CMUL levers.
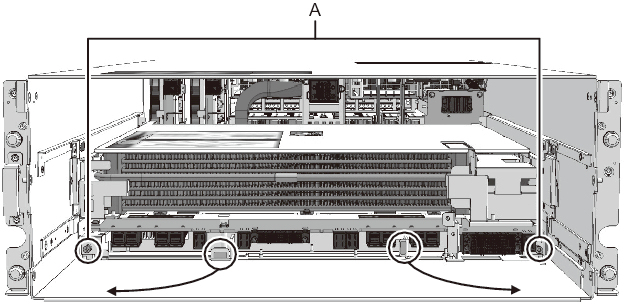
Loosen the fixing screws (A in Figure 17-15) of the CMUL levers.
|
Figure 17-15 Fixing Screws of the CMUL Levers
|
|
- Remove the CMUL.
- a. Hold the CMUL levers (A in Figure 17-16), pull out the CMUL to the tip of "NEAR to END", and then hold it at "HANDLING POSITION" (B in Figure 17-16) on its side.
- b. Hold the CMUL at HANDLING POSITION, and remove it from the server.
|
Figure 17-16 Removing the CMUL
|
|
|
| Note - After removing the CMUL from the server, place it horizontally on the workbench gently to avoid mechanical shock. |
< Previous Page | Next Page >