12.3 Removing a Crossbar Unit
12.3 Removing a Crossbar Unit
This section describes the procedure for removing a crossbar unit.
Enable the removal of the crossbar box before attempting to remove it. For details, see "Chapter 7 Maintenance Flow."
Enable the removal of the crossbar box before attempting to remove it. For details, see "Chapter 7 Maintenance Flow."
|

- Remove all crossbar cables (optical) connected to the crossbar unit requiring maintenance.
For details, see "11.3 Removing a Crossbar Cable (Optical)."
| Note - Make a note of the positions of the crossbar cables (optical) before disconnecting them to ensure that they are reinstalled correctly. |
- Loosen the two screws (A in Figure 12-2) on the right and left sides and lower the levers to release the crossbar unit.
|
Figure 12-2 Positions of Screws and Levers
|

|
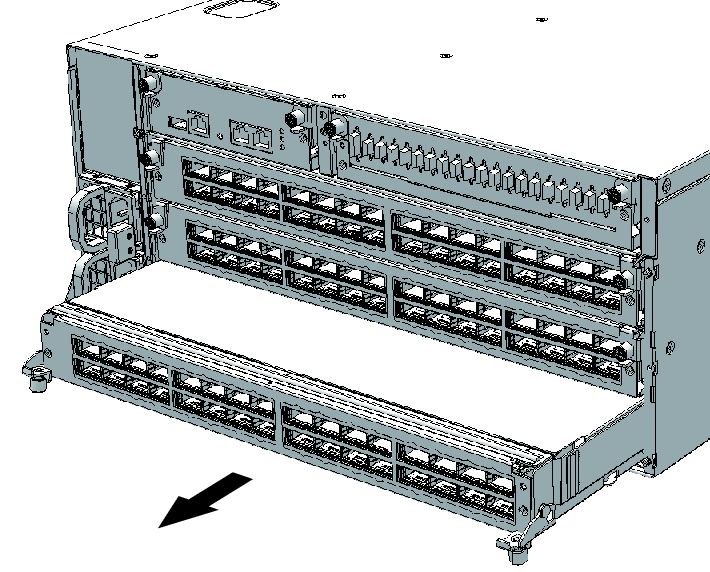
- Hold the levers and partially pull out the crossbar unit.
|
Figure 12-3 Pulling Out the Crossbar Unit
|
|
- Support the crossbar unit from below with one hand, and remove it carefully.
| Note - Place the removed crossbar unit on a grounded antistatic ESD mat. |
< Previous Page | Next Page >